You can add new columns to the Alarms Lists and Alarm Banner displays. This is useful when additional information is required, for example, if data from custom fields needs to be included in the alarm information.
To add a new column to the Alarms Lists and Alarm Banner:
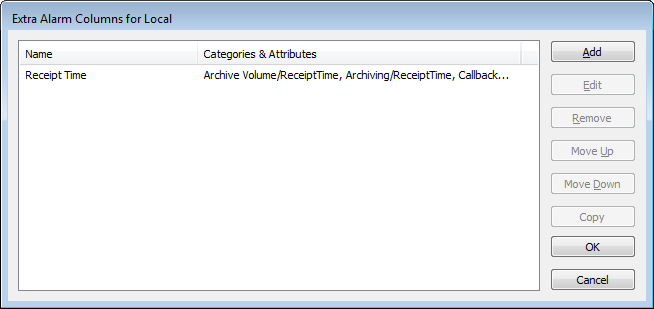
- Display the Extra Alarm Columns Window.
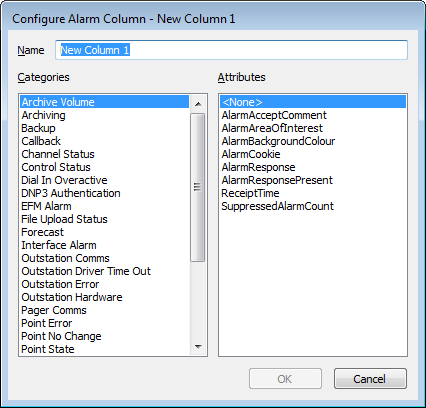
- Select the Add button to display the Configure Alarm Column window.

- In the Name field, enter a name for the new column. The name that you enter will be shown at the top of the column on the Alarms Lists and Alarm Banner.
- The entries in the Categories list represent different types of alarm. Entries other than text alarm entries, relate to tables in the database. The entries in the list vary, depending on the drivers that are installed on your system. (For information on the ‘core’ categories, see Alarm Category; for any driver-specific alarm categories, see the relevant driver guide.)
For each category in the list:
- Select the category, so that its attributes are shown in the Attributes list.
- Select the attribute that represents the data that you want to be shown when an alarm of the chosen category is raised. (For any category for which a relevant attribute does not exist, select the <None> attribute.) Each attribute typically corresponds to a field in the database.
- Repeat steps i and ii for the other categories in the list.
(By default, ClearSCADA assigns the <None> attribute to any categories that you do not select, so that the new column does not display a value for those type(s) of alarm.)
Example:
If you have created a new column that is to show receipt time of each alarm, you could select each category in turn and specify the ReceiptTime attribute for each category. This would set the new column to display the receipt time of every type of alarm that is raised. (If the Alarms Lists and Alarm Banner are not to display the receipt time for certain types of alarm, you could assign the <None> attribute to those particular alarm categories.)
- Select the OK button to confirm your selection and close the Configure Alarm Column window.
The name of the new column and its associated categories and attributes are displayed in the Extra Alarm Columns window.
- Repeat steps 2 to 5 for any other columns that you want to add to the Alarms Lists and Alarm Banner.
- Once you have added the extra column(s), select the OK button on the Extra Alarm Columns window.
The changes are saved and the window is closed. The extra column(s) are added to the Alarm Banner on ViewX clients, and will be included on Alarms Lists when they are next displayed. If a user is logged on to a WebX client when the changes are implemented, they will have to log off and back on to that client in order to for the Alarm Banner to show the column changes.Example:
The figure below shows an Alarms List with an extra column named ‘Current Channel’. The column displays the CurrentChannelName (the name of the channel that is currently being used) for alarms that have been raised due to an Outstation Comms, Outstation Error, or Outstation Hardware error.

If required, you can Change the Default Order of Extra Alarm Columns. You can also Adjust the Columns on an Alarms List or the Alarm Banner so that, for example, columns, including those that appear on the Alarm Banner or in the Alarms List by default, are displayed in a different order, or have a different width.