To create and configure an item in the database, you need to be logged on via a User Account that:
- Has the Configure Database feature enabled. This is enabled via the User Form (see User Accounts in the ClearSCADA Guide to Security).
- Is allocated the relevant permissions, such as the Configure permission for the Group to which you want to add a database item, or the item that you want to configure. Permissions are allocated via the Security window (see Allocating Security Permissions in the ClearSCADA Guide to Security).
You also need to be aware of the Database Structure and Database Security requirements of your system, and have undertaken any necessary Preparation.
The primary means of accessing the database structure within ViewX is by using the Database Bar. This is one of the Explorer Bars that can be displayed in a pane to the left of the main ViewX work area (see Explorer Bars used in ViewX in the ClearSCADA Guide to ViewX and WebX Clients Guide).
To add an Aquis Server item to the database:
- Display the Database Bar (see Display an Explorer Bar in the ClearSCADA Guide to ViewX and WebX Clients).
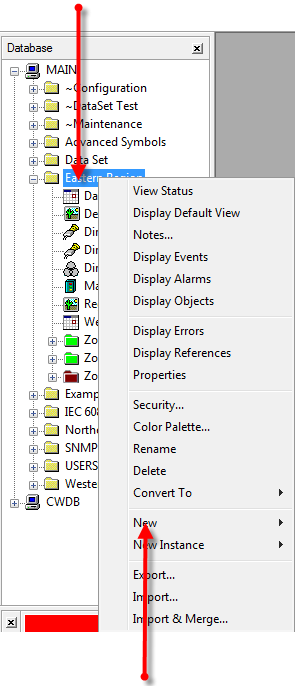
- In the Database Bar, right-click on the Group, or Group Template within which you want to add the item.
A context-sensitive menu is displayed.Select the Group or Group Template within which you want to add an Aquis Server item.

- Select the New option.
A context-sensitive menu is displayed. - Select the Other option to add an Aquis Server.
A further context-sensitive menu is displayed. - Select the Aquis Server item to create the item.
An Aquis item is added to the ClearSCADA database. The entry is highlighted, ready for you to define its name. - Give the item a suitable name (taking into account the ClearSCADA Naming Restrictions).