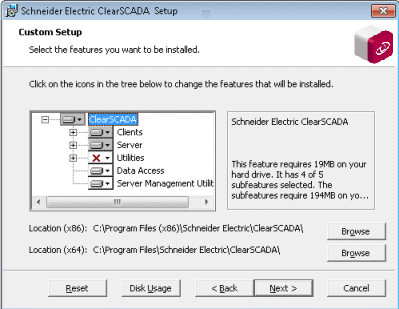
ClearSCADA allows you to select the components that you want to install on the server and clients by selecting the Custom installation option. When you choose Custom on the Choose Setup Type ‘page’, the Custom Setup ‘page’ is displayed.

Use the ‘tree’ on the left-hand side of the ‘page’ to choose which components are installed. The ‘branches’ that are shaded gray can be expanded to reveal a series of components, which you can then include or exclude from the installation as required.

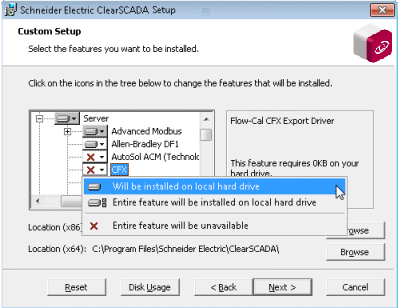
Use the plus and minus icons to expand and collapse the tree as required. To include or exclude a component (or entire collection of components), right-click on the branch or individual component and choose from these options:
- Will be installed on local hard drive—The selected component will be installed. If the component has sub-components, only those that are also selected will be installed.
- Entire feature will be installed on local hard drive—The selected component and all of its sub-components will be installed.
- Entire feature will be unavailable—The component will not be installed.
You can also use the Choose Setup Type ‘page’ to define where the chosen components will be installed. The 64-bit components are installed to the directory indicated for Location (x64) and 32-bit components are installed to the directory shown for Location (x86). You can use the Browse buttons next to each Location to specify a different location if required.
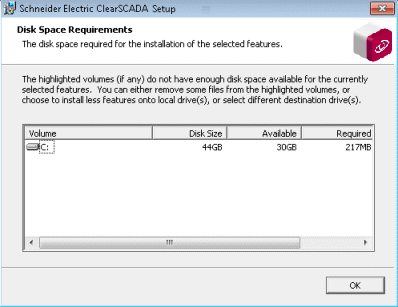
For information on the amount of disk space required for the installation you have chosen, select the Disk Usage button. This displays the Disk Space Requirements window, which shows any volumes that have insufficient space available.

When you have selected the components you want to install, select the Next button to proceed to Create a Super User Account.