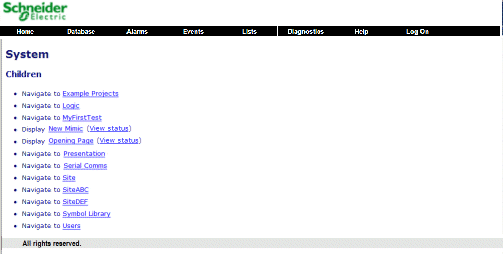
You can use the WebX interface to access displays for individual database items. For each database item there is a Status display that provides the latest values and information, in a similar way to ViewX. As in ViewX, the database items are organized in a hierarchy, with Groups, Group Templates and Group Instances containing other items. You typically use the Database Bar to locate the items in your database. The Database Bar functions in a similar way to that in ViewX.
To access database items via WebX:
- Select the Database button on the navigation bar.
This displays the Database Bar on the left-hand side of the document display area. The Database Bar provides access to the hierarchy of items in your database. - To expand the tree-structure in the Database Bar, select the entry that represents your system (database).

Each entry in the Database Bar represents a database item, Group, Group Template, or Group Instance that exists in the database. Each entry comprises the name of the item and an icon that indicates the type of item that the entry represents. If you select an entry for a database item, WebX displays information about the selected item. If you select an entry for a Group, Group Template, or Group Instance, WebX expands the tree-structure to show the items within that Group, Group Template or Group Instance.
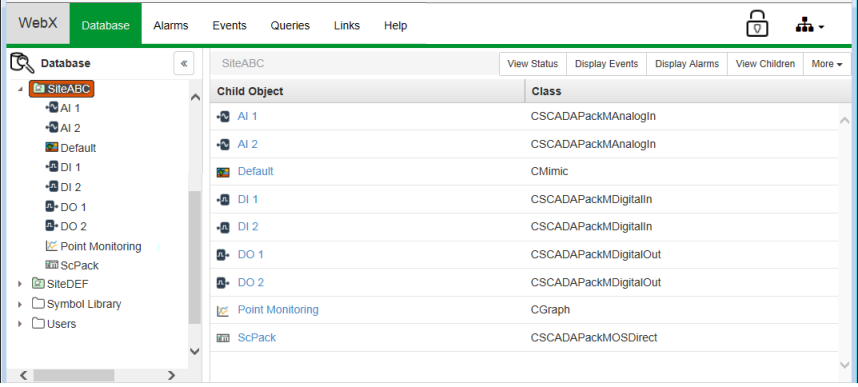
- Select the SiteABC entry to expand the tree-structure for the 'SiteABC' Group Instance.
The expanded tree-structure shows the database items, along with any Groups, Group Instances, or Group Templates, that are contained within the 'SiteABC' Group Instance. Collectively, these are called the Group Instance’s 'Child Objects'. - With the tree-structure expanded for the Group Instance, select the SiteABC entry again.
The document display area to the right of the Database Bar displays a list of the 'Child Objects' that are contained in the 'SiteABC' Group Instance.
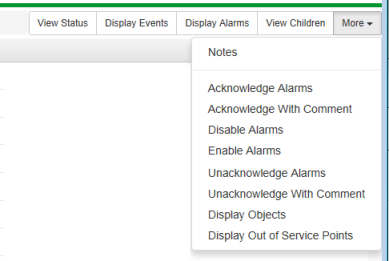
A set of buttons is displayed to the top-right of the document display area (View Status, Display Events, Display Alarms, and so on). The More button provides access to further context-sensitive options that vary, depending on your user account's permissions and the status of the items in the Group Instance. The options are equivalent to the context-sensitive menu options that you can also access by right-clicking on the 'SiteABC' Group Instance entry in the Database Bar.

- Select the entry for the AI 1 database item, either from the Database Bar or from the Child Object list.
The Status information for AI 1 is displayed in the document display area. - Expand other branches of the tree-structure in the Database Bar, and select other items in the database. With some types of item, such as Mimics and Trends, you can view the item's display. We show you how to navigate some of those displays later on in this tutorial.
- Use the Database Bar, context-sensitive menu options, and the web browser’s Back and Forward buttons to navigate your database and the various displays.
When you are comfortable using the navigation features and know how to locate database item displays, you can proceed to the next section: Use the Mimic Navigation Tools to Access other Displays.
Further Information
Using WebX to Access Database Items: see Browse your Database on a WebX Client in the ClearSCADA Guide to ViewX and WebX Clients.