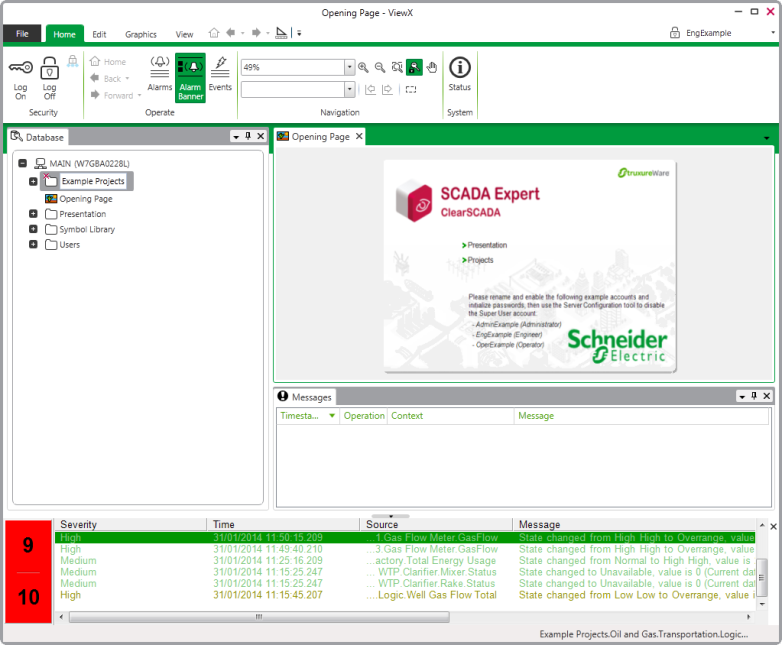
When you first install the demo system, ViewX runs automatically. To begin with, it displays a Mimic (graphical display), the Database Bar which contains a hierarchy of Groups, Message window that provides feedback and the Alarm Banner which is shown at the bottom of the ViewX interface, similar to that shown below.
Click on the different parts of the image to access more information about how to use each part of the interface

NOTE: The demonstration database provided alongside this tutorial provides you with user permissions to access all the main features within ClearSCADA. For example, to design and configure mimics. When you use an operational system your user permissions may be restricted to certain features.
ViewX is the main ClearSCADA client interface and can provide access to a wide range of features, including:
- A hierarchy of your database that you can browse easily
- Mimics
- Alarm displays
- Trends
- Logic programs
- Queries Lists
- Event Journal
- Configuration Forms and Editors
- OPC current and historic data
- Security settings.
As you progress through the tutorial, you will learn about many of the ClearSCADA ViewX client features and will come to use the configuration and editing displays. But to begin with, we would like you to complete the following steps so that you have a better understanding of the ViewX interface:
- Import the Example Projects
- Log on to your System
- Disable the Alarm Bell
- Tabs and Ribbons
- Quick Access Toolbars
- Explorer Bars
- Document Display Area
- Alarm Banner
When you have worked with the various areas of the ViewX interface, you can Test Your Knowledge on the ViewX Interface and see just how much you have learned.