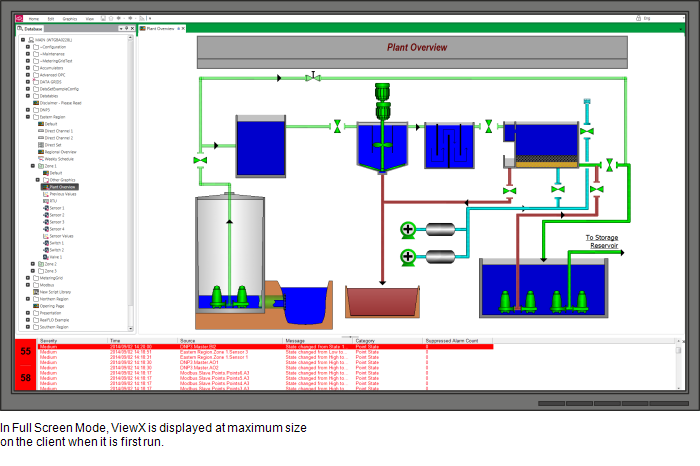
You can use the Options window to set a client PC to display ViewX in full screen mode. Full screen mode is particularly useful when the client PC is primarily used for interacting with ClearSCADA, as it means ViewX always starts at its maximum size.
When ViewX launches in full screen mode, the following occurs:
- The ViewX title bar does not display
- The ribbon is minimized (see Minimize the Ribbon in the ClearSCADA Guide to ViewX and WebX Clients)
- The File Menu button displays at a reduced size
- The Status Bar does not display
- The Minimize, Maximize, Restore and Close buttons do not display
- Tool windows do not display
- The Alarm Banner is closed (if the current user has Can Remove Banner enabled in their User settings)
- ViewX extends over the Windows taskbar.

To enable or disable full screen mode:
- Log on to the client PC via a user account that has the Configure Options permission (see Define the ViewX Configuration Settings for a User in the ClearSCADA Guide to Security).
- Display the Options Window.
- In the Miscellaneous section, select the Start Full Screen check box to enable full screen mode or clear the check box to disable full screen mode.
- Select the OK button to apply the changes.
NOTE: The text '(Overridden by startup configuration)' appears alongside a property when that property is unavailable for configuration via the Options window. The text is displayed when the ViewX client is configured to run on a Multi-Monitor setup for which the Startup Configuration File determines the value of that property.
Full screen mode only affects how ViewX is displayed when it first runs. If the current user has Can Toggle Full Screen enabled in their User settings (see Define the General Settings for a User in ViewX in the ClearSCADA Guide to Security), they can turn off full screen mode. To do this:
- Select Full Screen from the Window command group on View tab.
Or:
- Use the F11 shortcut key.
The full screen mode should not be confused with the restricted workstation feature, which restricts users to only accessing ViewX on that particular client PC (see Define whether the ViewX Client is a Restricted Workstation).
Further Information
Multi-Monitor setup: Launch a Window Container in Full Screen Mode