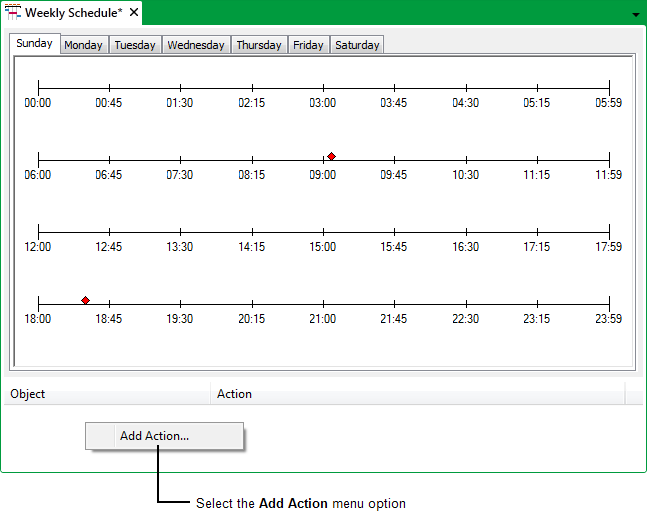
Follow this procedure if you want to add an action to any type of Schedule by using the Schedule’s Add Action menu option:
- Display the Schedule in Design Mode.
- Right-click on the Schedule Display’s Object area.
A context sensitive menu is displayed.
- Select the Add Action menu option.
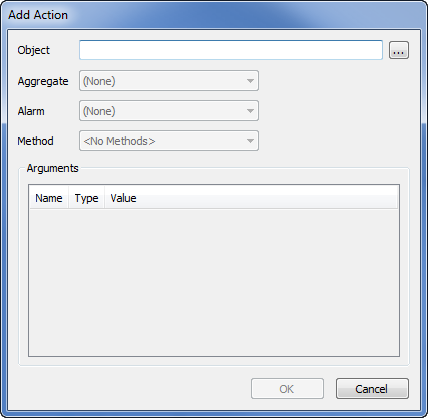
The Add Action window is displayed.
- Use the Add Action window to:
- Specify the database item for which you want to schedule an action.
- If applicable, specify the Aggregate with which the action is associated.
- If applicable, specify any particular Alarm with which the action is associated.
- Specify the actual Method (action).
- If applicable, specify the values of any argument(s) that further define the action.
For more information on using the window, see Specify a Method.
The name of the database item, and the action that you have selected, are shown in the Object and Action areas at the bottom of the Schedule Display. The values of any arguments that apply to the action are displayed in a comma-separated list after the action name.
- Repeat steps 2 to 4 for any other actions that you want ClearSCADA to trigger at the same time, using the same Schedule.
(With a Schedule on which you assign events to more than one tab, the actions that you specify on the Schedule Editor trigger automatically at each of the event times that you specify on each of those tabs.)
- Save the configuration (see Saving Configuration Changes).
If an action no longer needs triggering by a Schedule, you can delete that action (see Delete a Scheduled Action).
You can also:
- Move the events associated with the action(s) (see Move an Event)
- Check the Event Trigger Times
- Delete obsolete events (see Delete an Event)
- Further Edit a Scheduled Action
- Adjust the Order in which Actions are Triggered.