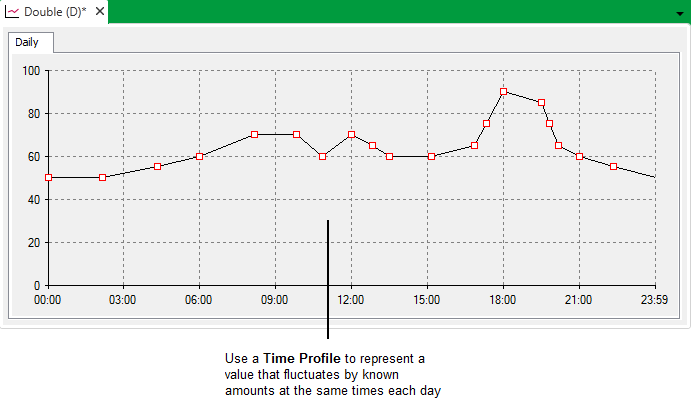
A Time Profile can be used for comparing a known set of values with other data. For instance, you might use a Time Profile with a Logic program, in order to compare actual data values with a set of pre-compiled data values (see Example Configuration). This can be useful for checking for unusual fluctuations in value. You can also use a Time Profile for providing a time varying control value, such as a Set Point. A Time Profile’s current value updates once a minute, at the beginning of each minute.
A Time Profile’s values are obtained from configuration, rather than directly from a ‘live’ source. Each Time Profile has either a one-day or one-week span—the change in value over that span is repeated on a daily or weekly basis, from midnight at the start of the span period. A Time Profile is configured by adding vectors to a graph—the vectors define the Profile’s value at different times of the day or week. You can generate a Time Profile’s vectors manually or automatically, and can optionally base the vectors on actual historic data taken from any historical source on your system.

By assigning Time Profiles to an analog point, you can set the point's limit values to change at different times of the day or week. This enables the level at which ClearSCADA generates alarms to vary during the course of each day, to take into account expected variations on site. The driver-specific documentation indicates whether a particular point type supports Time Profiles.
To create and configure a Time Profile, you need to:
- Add a Time Profile.
- Configure the Properties on the Time Profile Form.
- Edit a Time Profile.
- Save the configuration (see Saving Configuration Changes).
You can use a Time Profile’s Status display, or the Time Profiles List, to ascertain information about any of the Time Profiles on your system. For information on Lists, see the ClearSCADA Guide to Lists; for information on Status displays, see Status Displays in the ClearSCADA Guide to ViewX and WebX Clients.
Further Information
Using Logic: see the ClearSCADA Guide to Logic.
Assign Time Profiles to Analog Point Alarm Limits: see Specify any Alarm Limit Profiles in the ClearSCADA Guide to Core Point Configuration.
For an example that demonstrates how a Time Profile might be used in a Logic program, see Example Configuration.