NOTE: For information on exporting reports, see the ClearSCADA Guide to the Crystal Reports Driver.
You can make a copy of ClearSCADA database items and store them in an export file. You can then import the export file into another ClearSCADA database. This means that you can copy items between databases, which helps to minimize the amount of time it takes to configure a system.
NOTE: The more database items that you select for export, the longer the export process will take. When ClearSCADA is exporting database items, it locks the database. During this time, updates to the server, acquisition of data, and operations from all database users may be delayed.
LOSS OF DATA
When ClearSCADA is exporting database items, it locks the ClearSCADA database. Therefore, when you export a large number of items, the server may not be able to acquire data and operations from all database users may be delayed.
The threshold at which these anomalies might occur may vary, depending on the type of system and the type of hardware that you have. However, we offer the following guidelines:
- Exporting more than 100,000 database items may delay operations on the server. For example, an alarm may be delayed for several seconds.
- Exporting more than 300,000 database items may cause clients to 'drop out' and drivers to restart. This could result in the loss of data and the loss of alarms.
If you need to export more than 300,000 database items, you could consider exporting smaller blocks of database items. For example, if your database is organized into groups, you could export the items from each group separately.
Alternatively, you could consider doing the export at a time when it is safe to do so.
To export a database item:
- Display the Database Bar (see Display an Explorer Bar in the ClearSCADA Guide to ViewX and WebX Clients).
- In the Database Bar, select the item that you want to export.
If you select a Group, Group Template, or Group Instance, the export file will contain a copy of the Group, Group Template, or Group Instance and the items within that group.
- In the Database Bar, right-click on the selected item.
A context-sensitive menu is displayed. - Select the Export command from the relevant command group.
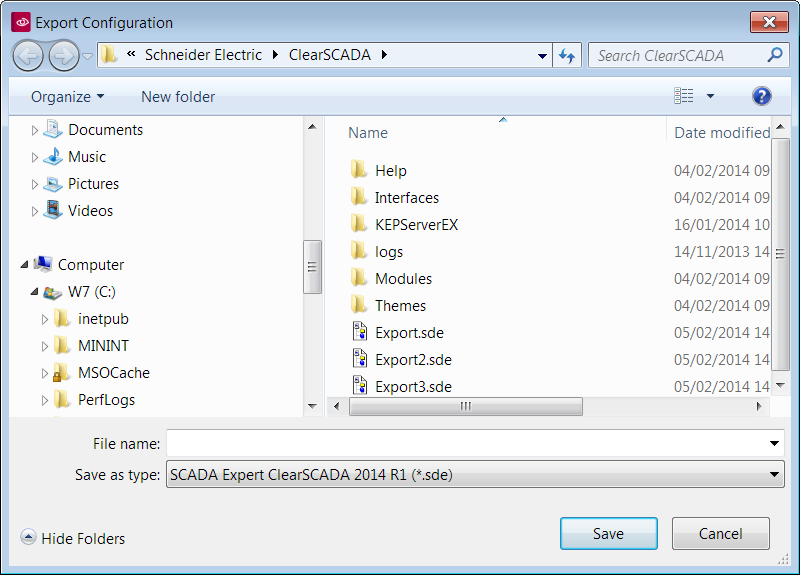
The Export Configuration window is displayed (the layout of this window varies, depending on the operating system that you are running).
- Use the Export Configuration window to specify the directory that will contain the export file.
- Enter a suitable name for the export file in the File name field.
- Use the Save as type combo box to select the ClearSCADA or extension version for the export file. You only need to use this setting if you are going to import the file into a system that is running an older version of ClearSCADA.
You should select the version that matches the version of the system into which you will import the file. For example, if you are exporting a file that will be imported into a 2010 R1 version of ClearSCADA, use the Save As type combo box to select ClearSCADA 2010 Edition R1 (*.sde).
NOTE: The export file you create can only be imported into a version of ClearSCADA (or an extension) that is identical to, or newer than the selected Save As type.
- Select the Save button on the Export Item window.
The Export Item window is closed and the selected item or group of items is saved as
a ClearSCADA Export file. The export file can be imported into any ClearSCADA database (see Import Database Items).
Further Information