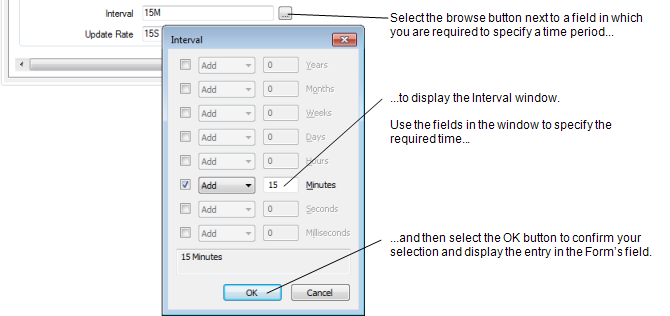
Use the Interval window to Specify a Time Period in the OPC Time Format. The window is displayed when you select the browse button next to a field in which you are required to specify a time period.

To specify a time period using the Interval window:
- Select the browse button next to the field in which you are required to specify a time period.
The Interval window is displayed. - Select the check box for the required time unit (for instance, select the Minutes check box if you want to specify a time period in minutes).
- Use the adjacent combo box to specify whether you want to Add or Subtract the time period. (You may want to select the Subtract option if you are specifying a time period that comprises a combination of time units, in order to produce the time period that you require (see the example below).)
- Use the corresponding text entry field to specify the actual time value (for instance 2, for 2 Days, Hours, or Minutes, and so on.)
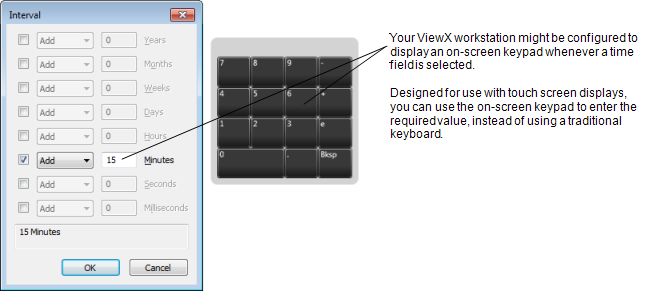
If the Interval window is accessed from a ViewX workstation on which the On-Screen Keyboard feature is enabled, a keypad is displayed on-screen whenever you select a time field.
Either enter the time value in the text entry field directly, or Use the Numeric Touch Screen Keypad to specify the required value.

- Repeat steps 2 to 4 for any other time units and values that are required to produce the overall time period.
The resultant time period is shown in the display area at the bottom of the window. The period is updated as you use the above fields to produce the required interval. - Select the OK button to close the Interval window and display the specified time period in the field on the configuration Form.
Years and Months are only supported in a few select places, each of which are not fixed periods—for example a Trend’s x-axis interval. Where Years and Months can be used, they are combined with an Offset. For instance, with an Offset of ‘Y’ (the beginning of this year), you can specify an Interval of ‘1Y’ (to give ‘this year’).
Fields for small time units, such as Milliseconds, are only included in the Interval window when such a time period might need specifying.
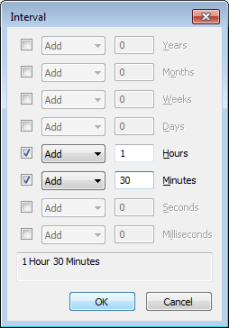
Example:
To use the Interval window to specify a time period of one hour and 30 minutes, you would specify the following:

On Forms, although the time period will initially be displayed in full in the field on the Form, once the Form is re-displayed, for numeric fields the time period will appear in short OPC Time Format:

For string fields, the time period will remain in exactly the format in which it was entered, including any blank spaces. (To ascertain whether a field is a numeric field or a string field, select the field and look at the field type that is displayed in the Status Bar at the bottom of the ViewX window.)
Further Information
To enter a time period directly in ClearSCADA, see Specify a Time Period in the OPC Time Format.