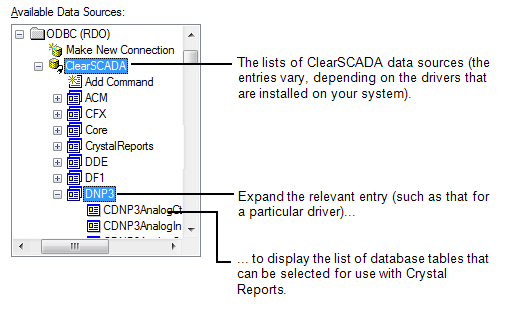
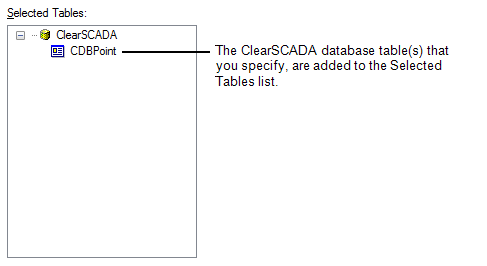
In order for the Crystal Reports application to access the data that you want to use in a report, you need to specify the ClearSCADA database tables with which that data is associated. You need to do this on a per report basis.
To specify the database table(s) that you want to use in a report that is being produced using Crystal Reports:
- View your report on the Design tab of the Crystal Reports application (or, in the case of a subreport, the relevant subreport tab).
- Use the Database menu to display the Database Expert window (for information on accessing this window, see Connect to the ClearSCADA Database).
- Expand the ODBC (RDO) entry in the tree-structure.
The ClearSCADA DSN is displayed (if no connection exists to the ClearSCADA database, see Connect to the ClearSCADA Database). - If necessary, expand the ClearSCADA entry.
A hierarchical list of existing ClearSCADA data sources is displayed. - Expand the list of ClearSCADA data sources as required. (For instance, if the DNP3 driver is installed on your system and your report is to reference a particular DNP3 table, expand the DNP3 entry to access the list of tables that exist on that driver—each driver has a separate table for each type of database item that it supports.)

In addition to driver-specific categories, the ClearSCADA data sources include several ‘generic’ categories for non-driver-specific database tables, such as Core, Historic, HistoricView, Kernel, and Metadata.
- Select the table(s) that you require.
The selected table(s) are highlighted.In many cases, you may only need to select a single database table.
However, for complex reports, or reports that query historic data, you may want to specify several tables, in order to include data for the type(s) of item for which you want to produce a report. In such cases, you will need to Specify the Links Between Multiple Tables.
To include data from unrelated tables, consider whether to Use a Subreport to Include Unrelated Data in the Same Report, a ClearSCADA Data Grid, or a ClearSCADA Data Table (see Custom Tables and Fields).
NOTE: You can use standard key combinations, such as the CTRL and SHIFT keys, to select multiple table entries. For further information on selecting tables for use in reports, see the documentation supplied with the Crystal Reports application.
- Use the Right Arrow button to add the table(s) to the Selected Tables list.

- Repeat Step 6, as required.
- If your report is to access more than one database table, you need to Specify the Links Between Multiple Tables.
To include data from unrelated tables, consider whether to Use a Subreport to Include Unrelated Data in the Same Report, a ClearSCADA Data Grid, or a ClearSCADA Data Table (see Custom Tables and Fields).
- Select the OK button to confirm the settings.
The Database Expert window is closed.
The database tables are now available for selection from the Field Explorer Bar in the Crystal Reports application, enabling you to Add a Field to a Report.