ATTENTION: When you assign a DNP3 SCADAPack Profile to a point, any profile-controlled limits become ‘grayed out’ within the Alarm Limits section of the Point Form and overwritten with a different value. If you later disable one of more of the Profile’s vector columns, ensure that you suitably configure any point limits that are no longer profile-controlled.
With a DNP3 SCADAPack Profile, you can optionally disable the individual profile for a particular limit or current value. To do this, you disable the column of vectors for the limit or current value that is not to be profile-controlled. For a limit or current value not to be profile-controlled on a DNP3 SCADAPack point that uses Profiles, that particular profile has to be disabled on each day of the week. In other words, on every DNP3 SCADAPack Profile that is assigned to that point. (If a particular profile is disabled on some (but not all) days of the week, both the outstation and ClearSCADA will use the last value of the previous day’s profile as the value for the ‘missing’ (disabled) day(s).)
The current value of a DNP3 SCADAPack Analog point can only be profile-controlled if that point has a Point Type other than ‘Physical Input’. With a ‘Physical Input’ analog point, you need to ensure that the Current Value profile is disabled on any DNP3 SCADAPack Analog Profile items that are to control any of that point’s limits.
(A DNP3 SCADAPack Binary point that has a ‘Physical Input’ Point Type cannot be profile-controlled. As such, that Point Form’s Profiles fields are ‘grayed out’ and unavailable for use.)
To disable one or more column(s) of vectors:
- Display the Database Bar (see Display an Explorer Bar in the ClearSCADA Guide to ViewX and WebX Clients).
- Right-click on the Profile that you want to edit.
A context sensitive menu is displayed. - Select the Edit <Name> Profile option, where <Name> refers to the assigned profile name.
The profile editor is displayed in the Document Window. - Perform one of the following:
- To select a single column, right-click on the heading of the relevant column.
A context sensitive menu is displayed.
Or:
- To select more than one column, either:
- Drag over the headings of the relevant columns.
- Right-click on the heading of the first column you require, then hold down the SHIFT key and select the heading of the last column you require.
The block of columns is selected.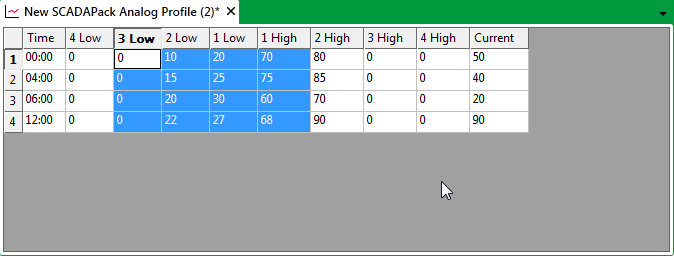
Or:
- Right-click on the heading of any one of the columns you require, then hold down the CTRL key while selecting any other columns that are required.
Each of the selected columns is highlighted.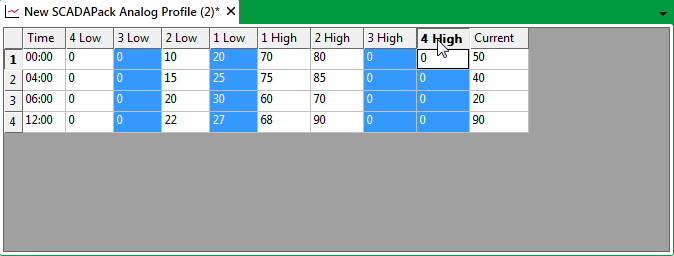
- Right-click on any of the selected columns.
A context sensitive menu is displayed.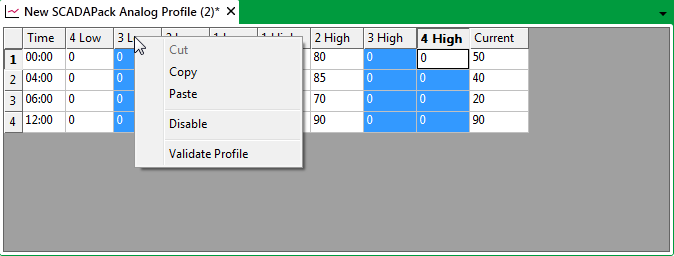
- To select a single column, right-click on the heading of the relevant column.
- Select the Disable option.
The vector values are removed and the column(s)’ background changes to gray.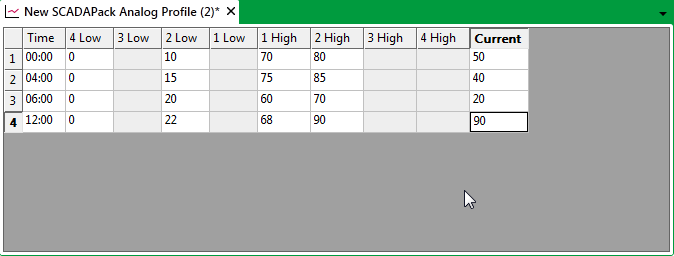
To enable one or more currently disabled column(s) of vectors, follow the steps above, but select the Enable option at step 3. You will then need to configure the vector values that apply to the re-enabled column(s).
Example:
A series of analog points are assigned two Daily (DNP3 SCADAPack) Profiles—one to control some of the points’ limits during weekdays, and another to control the same limits at weekends.
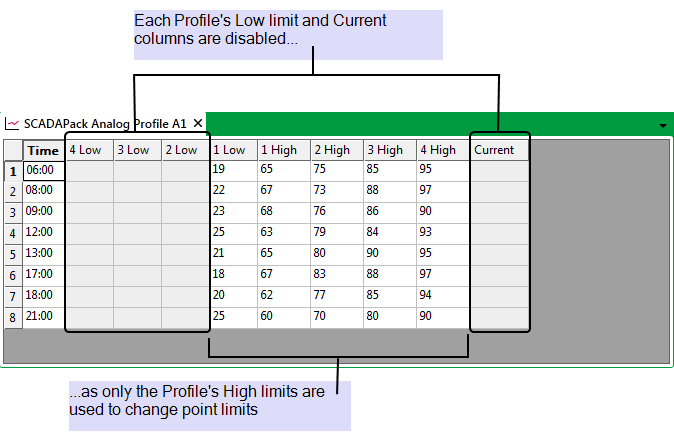
With both DNP3 SCADAPack Analog Profiles, only the High limit profiles are enabled. The various Low limit and Current value profile columns are disabled. (The same profiles have to be disabled on all DNP3 SCADAPack Profile items that are assigned to a DNP3 SCADAPack point, in order for a particular limit or the current value not to be profile-controlled.)
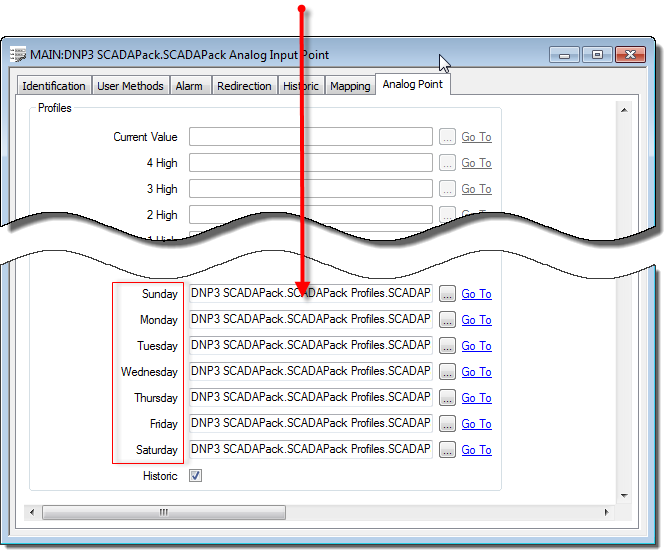
The Profiles are associated with the relevant DNP3 SCADAPack Analog points, by using the daily profile fields in the Profiles section of each Point Form. In this particular example, one DNP3 SCADAPack Profile is allocated to Saturday and Sunday, and the other to each week day (Monday to Friday). (With a profile-controlled point that uses Daily (DNP3 SCADAPack) Profiles, a DNP3 SCADAPack Profile has to be assigned to every day of the week.)
On each Point Form the DNP3 SCADAPack Profile items are assigned to the relevant days of the week.
With each point with which the Profiles are associated, the point’s fixed High limits are ‘grayed out’ (as those limits change according to whichever Profile is in force). The point’s other limits are fixed and are as per the values specified within the Alarm Limits section of the Point Form.
On the Forms of the points with which the profiles are associated, the point's fixed High limits are 'grayed out' (as these are profile-controlled)...
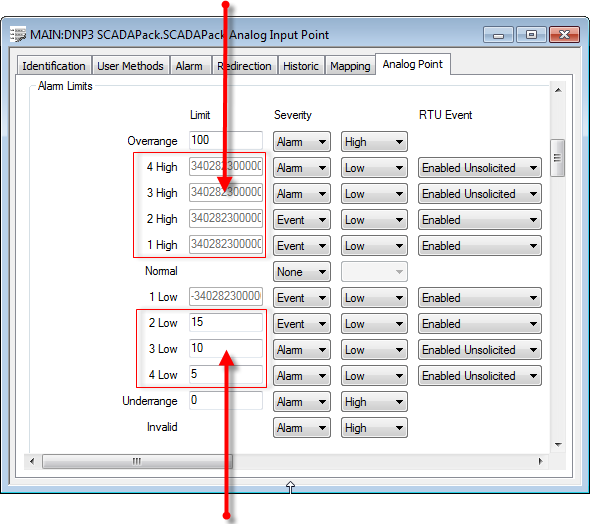
...whereas the point's Low limits are not profile-controlled and can be set.