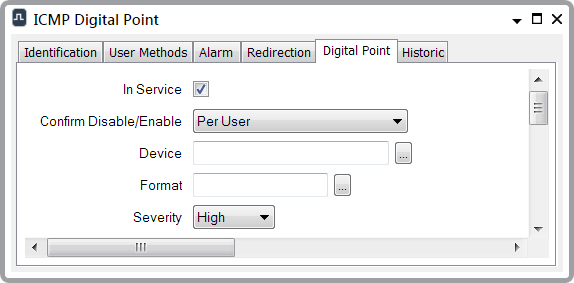
Use the fields at the top of the Digital Point tab to configure the basic properties of an ICMP Digital point:

- In Service—Use to specify whether the point is active or inactive (see Placing an Item In Service in the ClearSCADA Guide to Core Configuration).
- Confirm Disable/Enable—Users with the required permissions can disable a point that is In Service, or enable a point that is not In Service. Such actions are carried out using the Disable Point and Enable Point pick actions.
Use the Confirm Disable/Enable combo box to specify whether a confirmation dialog box is displayed whenever an operator requests that this point is disabled or enabled (see Requesting Confirmation of Action Requests in the ClearSCADA Guide to Core Configuration).
- Device—Use to specify the remote network-connected device with which this point is associated.
To specify a computer that is on the local network, select the browse button to display a Reference browse window and select the required device from the window.
To specify any other IP-connected device, enter the machine name, or the IP address, directly in the Device field.
- Format—Specify the format in which the point’s value appears in other ViewX displays, such as Lists. For further information, see Define the Format of a Digital Point’s Values in the ClearSCADA Guide to Core Point Configuration.
- Severity—Use this combo box to define the severity of any non-state events or alarms for the point.
For more information on severities, see Defining Severities in the ClearSCADA Guide to Core Configuration.
- Area of Interest—Only displayed if the Area of Interest feature is enabled on your system. Use this field to specify the Area of Interest with which any non-state related point alarms or events are to be associated (see Assign a Different Area of Interest to an Item’s Alarms and Events in the ClearSCADA Guide to Core Configuration).