You can use the Edit Points feature to reshape a line, shape, or pipe on a Mimic. This is useful when you need to create a curved edge.
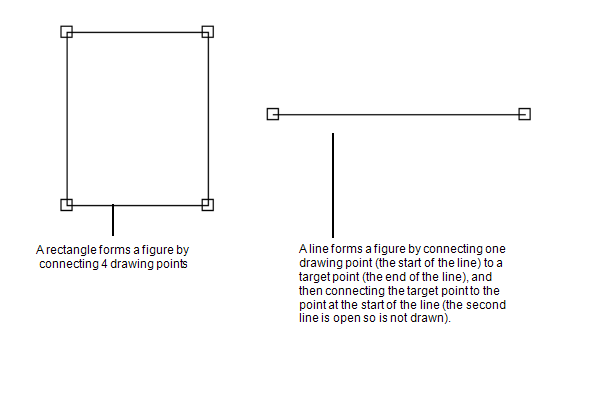
Each shape (including lines) consists of an uninterrupted line that forms a ' loop'. For example, a rectangle forms a ' loop' by joining 4 drawing points (corners) and a line forms a ' loop' by joining two points twice. The 'loop' is referred to as a figure.
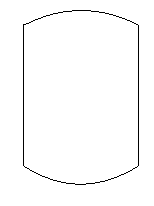
By using the Edit Points feature and then making use of the segment tools, you can move part of a figure. This allows you to manipulate shapes so that they can form irregular shapes or can have curved lines. For example, you can curve two ends of a rectangle so that it looks like a cylinder.
To change the shape of a line, shape, or pipe:
- Display the relevant Mimic in Design mode.
- Right-click on the Mimic object that you want to alter.
A context sensitive menu is displayed. - Select the Edit Points option.
The handles for the object are shown and the segment options become available.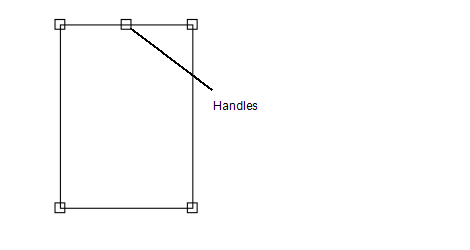
If you want to reshape the object but have no need for curved lines, proceed to step 4.
If you want to reshape the object so that it has one or more curved lines, proceed to step 6.
If you want to reshape the object so that a segment is opened, closed, or removed, proceed to step 10.
- Select a handle and drag it to a new position.
- Repeat step 4 for the other handles until the Mimic object has the required shape.
NOTE: If you need to divide a line, right-click on it and select the Split Segment option. An additional handle is added to the line.
If you need to open, close, or delete any of the segments, proceed to step 9, otherwise proceed to step 12.
- Right-click on the line that you want to curve. You can select any line between 2 handles. This means that you can select parts of a line if the line has several handles.
A context sensitive menu is displayed. - Select one of the following options:
- Curve Segment (1 Handle)—Adds 1 handle to the line. When you drag the handle, the line will curve with the handle being the center of the arc.
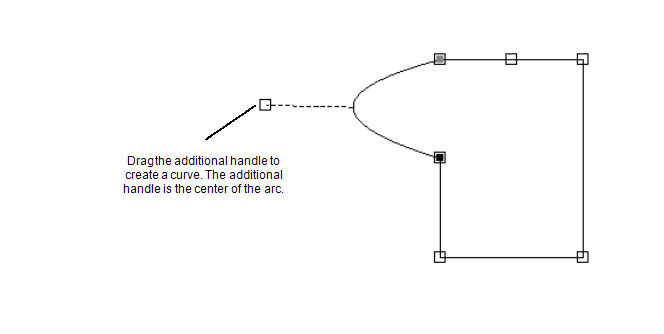
- Curve Segment (2 Handles)—Adds 2 handles to the line. The line can have 2 curves, one for each handle. When you drag either handle, the line curves with the selected handle being the center of one arc.
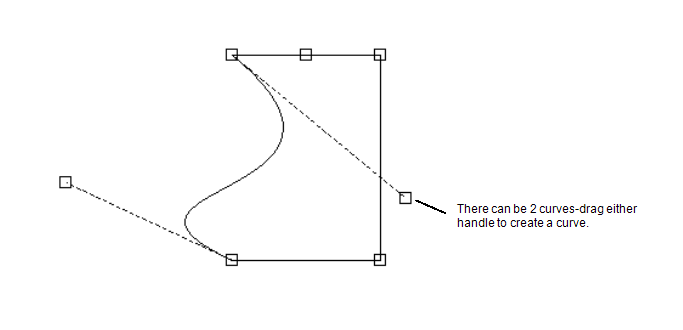
- Curve Segment (1 Handle)—Adds 1 handle to the line. When you drag the handle, the line will curve with the handle being the center of the arc.
- Drag the handle(s) to create the required curves. If you need to open, close, or delete any of the segments proceed to step 9, otherwise proceed to step 12.
- Select the segment that you want to open, close, or remove. The handles for the segment become black when it is selected.
- Right-click on the segment to display a context sensitive menu.
- Choose the appropriate option:
- Open Segment—Use this option to open the segment so that there is no line between its handles.
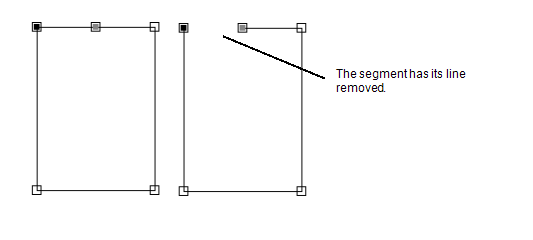
- Close Segment—Use this option to restore a line to an open segment.
- Delete Segment—Use this option to remove a segment. This will cause the object to be reshaped as the handles either side of the deleted segment will connect to complete the 'loop' for the line, pipe, or shape.
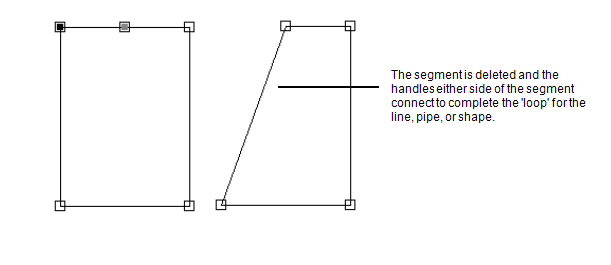
NOTE: You can straighten any curved segment by right-clicking on the segment and selecting the Straighten Segment option from the context sensitive menu.
- Open Segment—Use this option to open the segment so that there is no line between its handles.
- Right-click on the object and select the Select Object(s) option to return to the object selection mode (that is, turn Edit Points off).