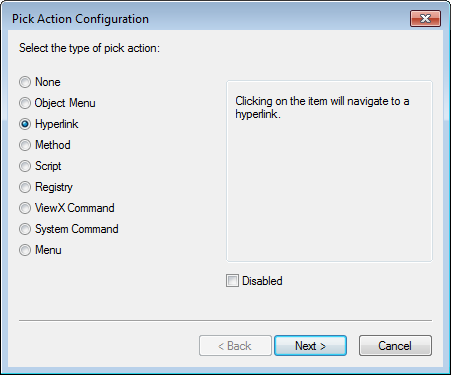
Any object on a Mimic can act as a 'trigger' for a hyperlink to another Mimic—when the object is selected, another Mimic is shown. The 'target' Mimic is the Mimic that is shown when the hyperlink is selected and it can be set to be displayed in the existing window or in a new window.
To create a hyperlink from one Mimic to another Mimic:
- Display the Mimic that is to contain the new hyperlink. You need to display the Mimic in Design mode (see Displaying a Mimic).
- Use one of the following methods to configure the hyperlink:
Drag and Drop:
- Display the Database Bar (see Display an Explorer Bar in the ClearSCADA Guide to ViewX and WebX Clients).
- In the Database Bar, select the 'target' Mimic's icon, then drag it onto the Mimic display.
When you release the mouse button, a context sensitive menu is displayed. - Select the Hyperlink option to add a text box to the Mimic.
The text box is automatically configured to act as a 'trigger'—when it is selected, the 'target' Mimic will be displayed.
You can edit the text box in the same way as any other text box (see Editing a Text Box).
For more information, see Using Drag and Drop to Create a Hyperlink.
Pick Action Wizard:
- Right-click on the Mimic object that is to act as the 'trigger' for the hyperlink. If the Mimic does not yet contain the object that is to act as the 'trigger', you should add the object then right-click on it (see Adding Objects to a Mimic).
When you right-click on the Mimic object, a context sensitive menu is displayed. - Select the Pick Action Wizard option to run the Pick Action Wizard.

- Use the various 'pages' of the Pick Action Wizard to set the type of pick action to Hyperlink, define the URL of the 'target' Mimic, define where the 'target' Mimic will be displayed, and define a ToolTip for the 'trigger' object.
For more information, see Using the Pick Action Wizard to Create a Hyperlink.
Animations:
- Right-click on the Mimic object that is to act as the 'trigger' for the hyperlink. If the Mimic does not yet contain the object that is to act as the 'trigger', you should add the object then right-click on it (see Adding Objects to a Mimic). When you right-click on the Mimic object, a context sensitive menu is displayed.
- Select the Animations option to display the Animations window.
- Use the Animations window to define animations for these properties:
- PickParam—Use an expression to define the location of the 'target' Mimic.
- PickType—Enter the number that corresponds to the type of hyperlink you want to create. The numbers and types of hyperlink are explained in Using Animations to Create a Hyperlink.
- PickComment—Enter a string that will be shown in the Status Bar when the cursor is positioned over the 'trigger' object. This is optional.
- ToolTip—Enter a string that will be shown in the ToolTip comment when the cursor is positioned over the 'trigger' object. This is optional.
- Select the OK button to confirm the animations and close the Animations window.
For more information, see Using Animations to Create a Hyperlink.
- When you have configured the hyperlink, save the Mimic.
The hyperlink will be available when the Mimic is displayed in Run Mode. When the 'trigger' object is selected, the 'target' Mimic will be shown in the relevant window (defined by the type of hyperlink).
The procedure above explains how to create a hyperlink that displays the 'target' Mimic at its default size. You can link to a Mimic shown at its default size or to any of the Mimic's configured views. For more information, refer to Creating a Hyperlink to a Mimic Shown at a Specific Level of Magnification.
Further Information
To create a hyperlink to the configuration Form for a Mimic, see Creating a Hyperlink to a Form.
To create a hyperlink to a Mimic that is displayed in a Window Container on another monitor, see Creating a Hyperlink to a ViewX ‘Document’ on Another Monitor.