The Fill tab contains the settings for fill colors. These are the colors that are shown within an object's boundaries. For example, the following shape has its fill color settings set to be a solid red:
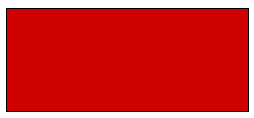
If you look closely, you will see that the outline of the shape is black. This is because the outline color is defined on the Line tab—the Fill tab settings only apply to the inner part of an object.
NOTE: For text boxes and buttons, the Fill tab settings apply to the background of the text box or button, not the text itself. The color of the text is defined on the Pen tab.
The Fill tab settings that are available vary according to the type of Mimic object you are editing. The possible Fill tab settings include:
The types include:
- None—No fill color is applied. This means that the object will appear to have a transparent fill. For example, a text box with its Type set to None will only have its outline and text visible.
- Solid—The fill color is a single color with no shading effects.
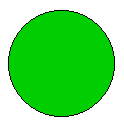
- Hatch—The fill color is a hatch pattern. The pattern consists of two colors that you can select in the Colors section. You can also change the style of hatch pattern by using the Pattern combo box in the Fill section.
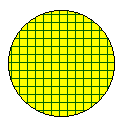
- Linear Gradient—The Linear Gradient option applies a two-color shading effect. One side of the fill is one color and the opposite side is the other color. The colors blend into each other in the middle of the fill, creating a 'bleed' effect.

You can define the two colors by using the Start and End buttons in the Colors section (see Using the Color Window).
You can change the position of the two colors by altering the Angle setting in the Fill section (see Fill Tab).
- Pipe Gradient—The Pipe Gradient option applies a 3D shading effect that makes the fill appear cylindrical. This feature was specifically designed to be used as the shading effect on pipe drawings and is the shading effect you can see on any pipes that you draw using the Add Pipe tool.

As with the Linear Gradient option, the Pipe Gradient feature has two colors.
The Line color is the color of the highlight bar that is inside the fill. This bar acts as the reflection of the light source. You can move the position of the line by dragging it in the preview panel at the top-right of the Properties window.
You can also define its position by changing the Position setting, and change its direction by using the Direction setting. Both settings are in the Fill section (see Fill Tab).
The Bounds color is the color of the fill. You can change the Bounds and Line colors by using the color buttons in the Colors section (see Using the Color Window).
- Radial Gradient—The Radial Gradient option applies an 'spherical' shading effect. Like the other Gradient types of shading, the Radial Gradient uses two colors—a Point color and a Bounds color.
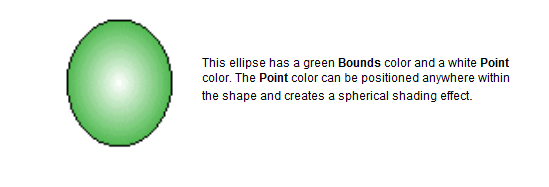
The Point color is the color of the highlight within the fill and it acts as the reflection of a light source. You can move the position of the point by selecting it and then dragging it in the preview panel at the top right of the Properties window. You can also define its position by changing the X Position and Y Position settings in the Fill section (see Fill Tab).
The Bounds color is the color of the fill. You can change the Bounds and Point colors by using the color buttons in the Colors section (see Using the Color Window).

The Flash section contains these settings:
- Blink—Defines whether the flash effect is enabled.
If the Blink check box is selected, the fill area will flash on and off.
If the Blink check box is clear, the fill area will not flash on and off.
- Mode—Use the Mode setting to define the speed of the flash effect and how many flash colors are used. The available modes are:
- On/Off (Normal)—The fill color flashes on and off (visible then invisible) at the normal rate which is 1 second on, 1 second off.
- On/Off (Fast)—The fill color flashes on and off at a faster than normal rate (half a second on, half a second off).
- On/Off (Briefly On)—The fill color flashes on for half a second and off for 1 and a half seconds.
- On/Off (Briefly Off)—The fill color flashes on for 1 and a half seconds and off for half a second.
- Two Color (Normal)—The fill color flashes from one color to another color every second. You can select the two Flash colors by using the Flash buttons in the Colors section (see Using the Color Window).
- Two Color (Fast)—The fill color flashes from one color to another color every half-second. You can select the two Flash colors by using the Flash buttons in the Colors section (see Using the Color Window).
- Four Color—The fill flashes from one color to the next color (in a four-color sequence) every half second. This feature is useful for creating the illusion of movement. For example, if you choose a Linear Gradient type of shading and select four shades of blue as the Start, End, and Flash (x2) colors, you can create a flash effect that looks like flowing water.
The Start color flashes between the selected start color and the shades between it and the selected start Flash color. Similarly, the End color, flashes between the selected End color and the shades between the selected end Flash color.
For example, if the Start color is red and the Flash color is white, the fill will flash:
1. Red
2. Red-White
3. White-Red
4. White
You can define the Flash colors by using the Flash buttons in the Colors section (see Using the Color Window).
- Offset—The flash Offset defines the sequence for color flashing effects.
Each set of flashing colors has a sequence. The sequence begins with the Start color and ends with the Flash color, with any other colors occurring in between. For example, for four color flashing, the sequence is:
1. Start color
2. Start color with some end color
3. Flash color with some start color
4. Flash color
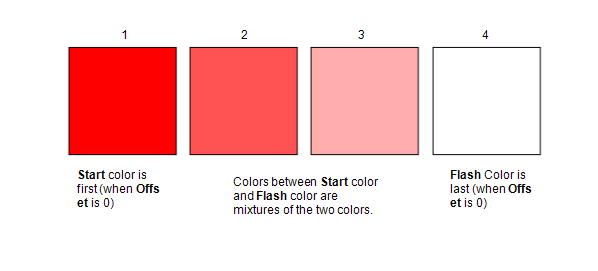
So, if the Start color is red and the Flash color is white, the sequence for a four-color flash is:
1. Red
2. Red with some white
3. White with some red
4. Red
By using the Offset setting, you can define where the Start color comes in the flashing sequence.
- Select 0 to set the Start color to be the first color in a flashing sequence.
- Select 1 to set the Start color to be the second color in a flashing sequence.
- Select 2 to set the Start color to be the third color in a flashing sequence.
- Select 3 to set the Start color to be the fourth color in a flashing sequence.
NOTE: For single color flashing effects, the Offset setting defines whether the flashing sequence begins with the Start color in view (on) or invisible (off).

- Fill—The Fill color button is only available when you choose a Solid or Hatch type of shading. It defines the background color of the object, so if you have selected Solid the object will be the Fill color and if you selected Hatch, the object will have a pattern over the top of the Fill color.
To change the Fill color, you need to select the Fill color button. To do this, simply select the color shown next to the Fill field name.
When you select the color button, a color palette is displayed. You can set the color button to any of the colors on the palette, or you can select the ... option to create a custom color on the Color window (see Using the Color Window).
- Hatch—Use the Hatch color button to define the color of the hatch pattern. This option is only available when you select a Hatch type of shading. You will also need to use the Fill color button to define the background color for the hatch pattern.
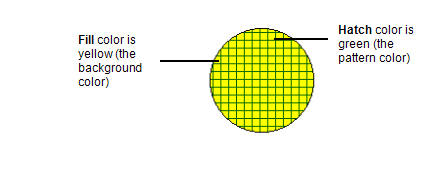
As with the Fill color button (see above), when you select the Hatch color button you can choose a color from the palette or use the ... option to create a custom color (see Using the Color Window).
- Start and End—The Start and End color buttons are only available when you choose a Linear Gradient type of shading.
The Start color is the color at one side of the object and the End color is the color at the opposite side of the object. The colors blend into each other in the middle of the object.

As with the Fill color button (see above), when you select the Start or End color buttons, you can choose a color from the palette or use the ... option to create a custom color (see Using the Color Window).
- Line and Bounds—The Line and Bounds settings are available when you set the shading type to Pipe Gradient.
- Use the Line color button to define the color for the highlight that is shown within the fill area of the object.
- Use the Bounds color button to define the color of the background of the fill area of the object.

As with the other color buttons, when you select the Line or Bounds color buttons, you can choose a color from the palette or use the ... option to create a custom color (see Using the Color Window).
- Point and Bounds—The Point and Bounds color settings are available when you select the Radial Gradient type of shading.
- Use the Point color button to define the color for the highlight that is shown within the fill area of the object.
- Use the Bounds color button to define the color of the background of the fill area of the object.

- Flash—Use the Flash color button(s) to define the alternate color when the flash effect is enabled (see the Flash settings, earlier in this section).
For single color effects, there is one Flash color button. The color will flash between the Fill color and the Flash color you select (the flash sequence may include shades between the two colors, depending on the type of flash you have set).
For multiple color effects, such as Linear Gradient shading, there is a Flash color button for each color in the effect. So for Linear Gradient shading, there is a Flash color for the Start color and a Flash color for the End color. One side of the object will alternate between the Start color and its Flash color and the other side of the object will alternate between the End color and its Flash color.
As with the other color buttons, when you select the Flash color button(s), you can choose a color from the palette or use the ... option to create a custom color (see Using the Color Window).
- Center and Edge—The Center and Edge color buttons are only available for Pipe objects. They work in exactly the same way as the Line and Bounds color buttons for Pipe Gradient shading (described earlier in this section). Center works in the same way as Line and Edge works in the same way as Bounds.
- % (Transparency)—The percentage spin-boxes next to each color button allow you to define the transparency of the color. You can set each color to have a minimum 0% transparency (solid) up to a maximum transparency of 100% transparency (invisible).
- Pattern—Use the Pattern combo box to choose the style of hatch for the object (the Pattern setting is only available if you have selected the Hatch type of shading). There are over 50 different styles available.
When you make a selection, you can see a preview of the style in the preview panel at the top right of the Properties window.
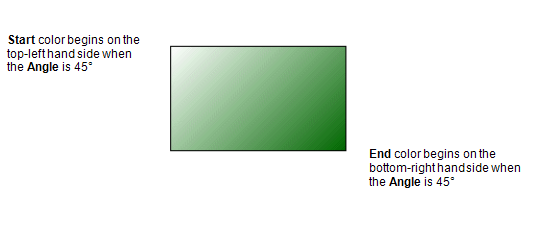
- Angle—The Angle spin-box is only available when you select the Linear Gradient style of shading. You can use it to alter the position of the Start and End colors. For example, if you set the Angle to 45°, the Start color begins at the top left-hand side of the object and the End color is at the bottom-right hand corner of the object.
- Direction, Position, and Indent—These settings are only available when you set the style of shading to Pipe Gradient.
Use the Direction combo box to choose the direction of the pipe shading. There are several directions available, including the standard Horizontal and Vertical as well as shading for corners.
The flange shading styles allow you to create cylindrical shading effects that are wide at one end and narrow at the other.

You can use the Position spin box to alter the location of the Line color. Simply increase or decrease the percentage as required. For vertical shading, the left hand side of the object begins at 0% and the right-hand side is 100%. For horizontal shading, the top of the object is 0% and the bottom is 100%
Alternatively, you can select the Line color in the preview panel and drag it to the required position.
When you select a Flange direction, an additional spin-box is displayed—Indent. Use the Indent spin-box to define the position of the bottom points of the flange shading. Decreasing the percentage will make the bottom of the flange shading wider (and so it will fill up more of the shape), whereas increasing the percentage will cause the bottom of the flanges to become smaller and more pointed.
When you make a selection, you can see a preview of the style in the preview panel at the top right of the Properties window.
- X Position and Y Position—The X Position and Y Position spin-boxes are available for the Radial Gradient shading effects and some Pipe Gradient shading effects. You can use these spin-boxes to define the vertical and horizontal position of the Line or Point color (as appropriate).
- The X Position represents the horizontal position. It begins at 0% on the left-hand side and goes to 100% on the right-hand side.
- The Y Position represents the vertical position. It begins at 0% at the top side and ends at 100% at the bottom side.
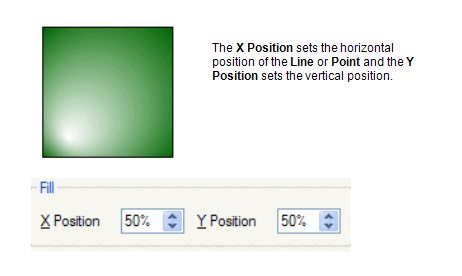
Simply increase or decrease the percentages to change the position of the Line or Point color as required. Alternatively, you can select the Line or Point in the preview panel and drag it to the required location (the X and Y Positions will be altered automatically).
When you make a selection, you can see a preview of the style in the preview panel at the top right of the Properties window.