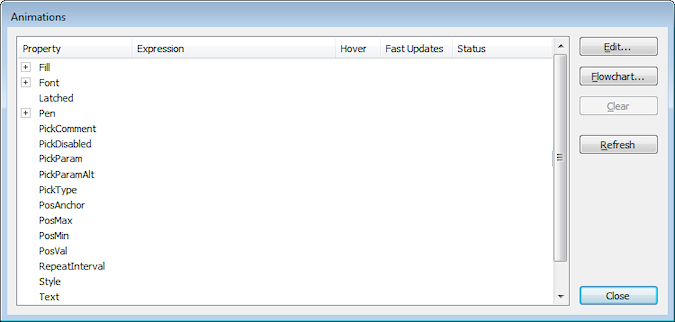
You can use the Animations window to create hyperlinks or adjust the existing hyperlink configuration to meet your needs. For example, if you have used drag and drop functionality to create a hyperlink, you can use the Animations window to alter the configuration of the drag and drop hyperlink so that it meets your requirements.
To use the Animations window to create hyperlinks, you need to have an understanding of Mimic Animations (see Animations).
To use the Animations window to create a hyperlink:
- Display the Mimic that is to contain the new hyperlink. You need to display the Mimic in Design mode (see Displaying a Mimic).
- Right-click on the Mimic object that you want to animate (the object that is to act as the 'trigger'). If the Mimic does not yet contain the object that you want to use as the 'trigger', you will need to create the object (see Adding Objects to a Mimic) and then right-click on it.
A context sensitive menu is displayed. - Select the Animations option to display the Animations window. You can also display the Animations window by double-clicking on an object and then selecting the Animations button on the General tab.

- Select the PickParam property (this is the Mimic object property that determines which display the hyperlink 'targets').
- Select the Edit button.
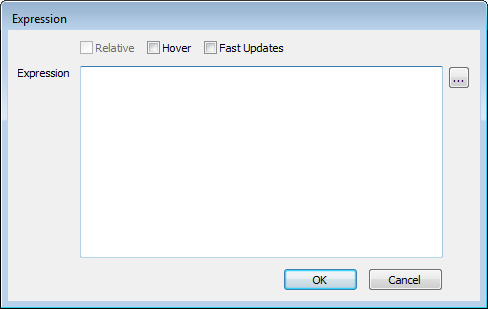
The Expression window is displayed.
- In the Expression field, enter the expression that will be used to access the target display.
- For ViewX displays on the same system, you need to use the format:
'SCX:////<Class>/<Path>'
For example,
'SCX:////CMimic/Overview Mimic'. Do not enter the angle brackets < >.NOTE: If the Relative check box is selected, you can use relative links to the 'target' display (see Relative References in the ClearSCADA Guide to Expressions).
- For ViewX displays on a different system, you need to use the format:
'SCX:///<System Name>/<Class>/<Path>'
For example, 'SCX:///Main/CMimic/Overview Mimic'. Do not enter the angle brackets < >, and take care to use an absolute reference as links between systems can only use absolute references (see Absolute References in the ClearSCADA Guide to Expressions).
- For web pages, you need to use the format:
'http://website address'
For example, 'http://www.schneider-electric.com'
NOTE: If you want to link to the Form of an item that has a graphical display, such as a Mimic, you have to edit the PickParam value.You will need to remove the class part of the address is removed. For more information on classes, see Class Information in the ClearSCADA Guide to the Database.
- For ViewX displays on the same system, you need to use the format:
- Select the OK button to confirm the expression and close the Expression window.
- Select the PickType property on the Animations window. The PickType property defines the type of pick action that is to be associated with the selected object. As you are creating a hyperlink, you need to set this property to a specific type of Hyperlink.
- Select the Edit button to display the Expression window.
- Enter the number that corresponds to the type of hyperlink you want to use:
- 3—The target display is shown in the Mimic window in place of the 'source' Mimic (the Mimic that contains the 'trigger' object). The window remains at its current size. This type of hyperlink is the Animations window equivalent of using the Pick Action Wizard to set the hyperlink Mode to 'Navigate'.
- 4—The target display is shown in a new inset window. The inset window uses the default size and position settings. You cannot use Animations to change the position and size of the window (to do this, you need to use the Pick Action Wizard). This type of hyperlink is the Animations window equivalent of using the Pick Action Wizard to set the hyperlink Mode to 'Open as Inset'.
- 10—The target display is shown in a new top-level window. The new window is sized automatically by the operating system. This type of hyperlink is the Animations window equivalent of using the Pick Action Wizard to set the hyperlink Mode to 'Open in New Window'.
- 11— The target display is shown in the Mimic window in place of the 'source' Mimic (the Mimic that contains the 'trigger' object). The window uses the default size and position settings. You cannot use Animations to change the position or size of the window (to do this, you need to use the Pick Action Wizard). This type of hyperlink is the Animations window equivalent of using the Pick Action Wizard to set the hyperlink Mode to 'Navigate & Resize'.
- 15— The target display is shown in a new inset window. The position of the inset window is relative to the position of the cursor when the 'trigger' object was selected. The inset window is sized automatically by the operating system. This type of hyperlink is the Animations window equivalent of using the Pick Action Wizard to set the hyperlink Mode to 'Open as Inset (Relative)'.
NOTE: If the target display is a web page, the web page will be displayed in a browser, such as Internet Explorer. It is possible to configure a hyperlink that opens a web page in a ViewX document window, but this can only be achieved by using the Pick Action Wizard (see Using the Pick Action Wizard to Create a Hyperlink).
- Select the OK button to close the Expression window and confirm your selection.
- Select the PickComment animation property. This property represents the information that is shown in the Status bar when the cursor is positioned over the 'trigger' object.
- Select the Edit button to display the Expression window.
- In the Expression field, enter the required text for the Status bar description. The text has to be enclosed in single quotes as it is a string value.
- Select the OK button to close the Expression window and confirm your entry.
- Close the Animations window.
- Save the Mimic.
When you display the Mimic in Run Mode, positioning the cursor over the 'trigger' object will cause the defined text to be displayed in the Status bar and the ToolTip description in the ToolTip comment. When you select the 'trigger' object, the 'target' display will be shown (in a new window, inset window, or in place of the Mimic, depending on which number you entered as the expression for the PickType property).NOTE: Steps 9-17 inclusive are optional.