ATTENTION: This topic relates to the deprecated Original WebX client that is supported by this and previous versions of ClearSCADA. For information about the WebX client that is supported by ClearSCADA 2015 R1 onwards, click here.
You can use WebX to display an unfiltered list of alarms on your system. You can then filter the Alarms List as required and use it to respond to alarm conditions.
To display an unfiltered alarms list:
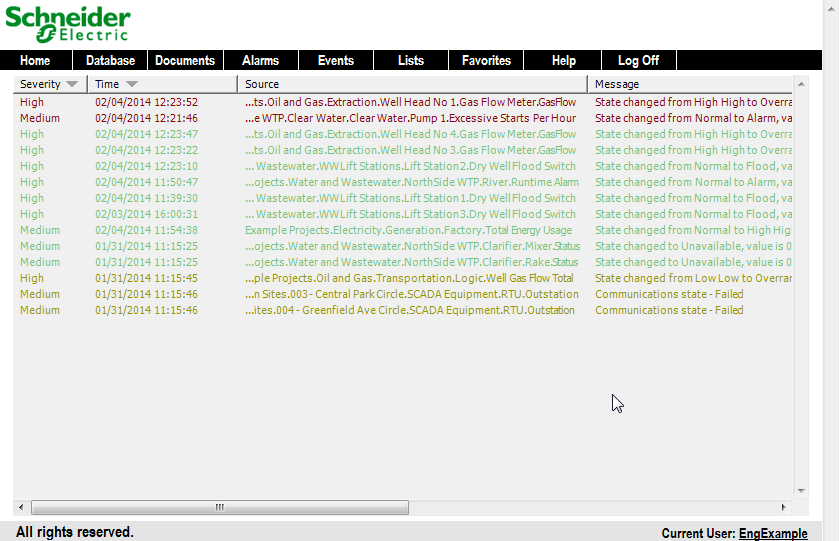
- Select the Alarms button on the navigation bar to display the Alarms page.

The Alarms page contains a list of the alarms on your system, and the alarm information is categorized under Severity, Time, Source, Message, and Category headings in the same way as alarms that are shown on the alarm displays in ViewX.
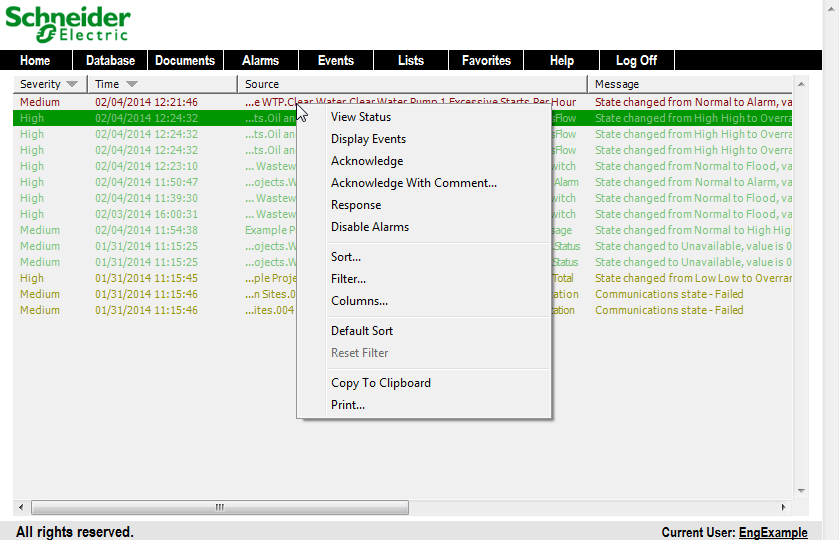
- Right-click on one of the alarms in the list to display a context sensitive menu.

You can see that on the context sensitive menu for the alarm, you have access to the alarm response options such as Acknowledge and Acknowledge with Comment. These alarm response features work in exactly the same way as on a ViewX client, meaning operators and engineers can manage alarms remotely.
NOTE: If there are no active alarms on your system, you can generate alarms by performing Hand Controls on database points. You can use WebX to access the Hand Control action for points—Select Lists> Points, then select OK so that a filter is not applied, then right-click on the required point in the Points List.
- Right-click on the background of the Alarms List to display a context sensitive menu.
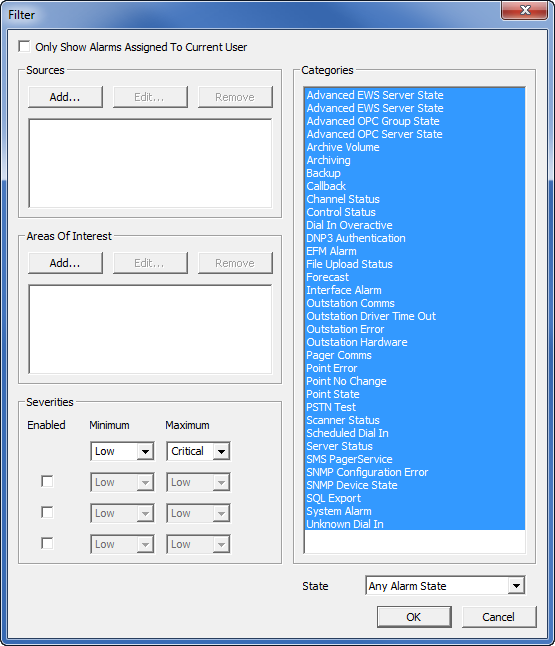
- Select the Filter option to display the Filter window.

You can use the Filter window to restrict the Alarms List so that it only shows alarms that meet certain criteria.
- Use the Filter window to restrict the Alarms List so that it only shows alarms that relate to the items in the 'SiteABC' Group Instance. To do this, you need to:
- Select the Add button in the Sources section to display the Add Source window.
- Use the browse button feature of the Source field to associate the source with the 'SiteABC' Group Instance.
- Select the OK button to confirm and close the Add Source window. You will see that the Sources list now contains 'SiteABC.*' which means the Alarms List is filtered to only show alarms for items that are in the 'SiteABC' Group or its subgroups.
- Select the OK button to confirm your selection and close the Filter window.The Alarms List is filtered so that it only shows alarms for items in the 'SiteABC' Group Instance (it doesn’t have any subgroups).
Now that you have displayed the System Alarms web page and learned how to access the filter settings, you can proceed to the next section: Display a List of System Events via WebX.
Further Information
Alarms: see View and Action Alarms on a WebX Client in the ClearSCADA Guide to ViewX and WebX Clients.
Filtering an Alarms List: see Use the Filter Window to Filter Alarm Entries in the ClearSCADA Guide to Alarms. This section describes the filter process in ViewX, but the same principles apply in WebX.