You can use the Options window to define whether the Guest user can access specific features from the client PC. The settings you put in place only apply to the client PC on which they are made and have no effect on the Guest user account when used on any other client or server.
To define the client specific settings for the Guest user account:
- In ViewX, display the Options window (see Display the Options Window in the ClearSCADA Guide to Client Administration).
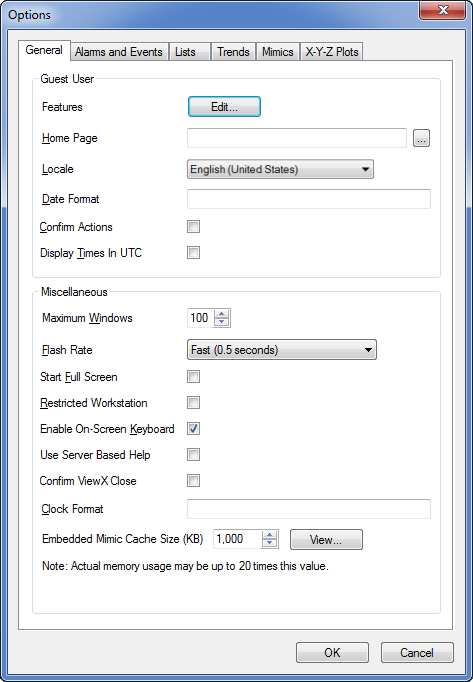
- On the General tab, use the Guest User section to configure the local Guest User settings for this particular client
- Select the Edit button next to Features to display the Features window.
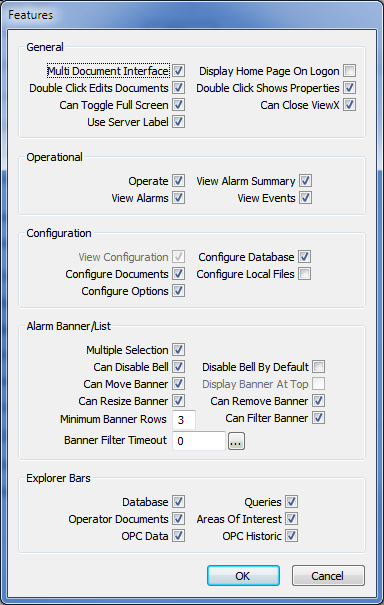
- Use the Features window to define which features are available to the Guest User. The settings on the Features window work in the same way as the corresponding settings on the User Form except that they apply to the Guest user account and so can be used by anybody that has access to the client.
The groups of feature settings are:
- General—see Define the General Settings for a User in ViewX.
- Operational—see Define which Operational Features are Available to a User in ViewX, and see Define the General Settings that Apply to ViewX and WebX.
- Configuration—see Define the ViewX Configuration Settings for a User.
- Alarm Banner/List—see Define which Alarm Banner and Alarms List Features are Available to a User in ViewX.
- Explorer Bars—see Define which Explorer Bars a User can Access in ViewX.
- Select the OK button to confirm your choices and close the window, or select Cancel to discard your selections and close the window.
- On the Options window, use the Homepage setting to select the Homepage display for the Guest User. This works in the same way as the Homepage setting on the User Form except that it only applies to the Guest user account on this client (see Define the Home Page Settings for a User).
- Use the Locale, Date Format, and Display Times in UTC settings to define the regional settings for the Guest User on this client only. These settings have to be set so that they are compatible with the Regional Settings on the Root Group Form (see Define the Global Settings for the Guest User Account).
- Use the Confirm Actions setting to define whether the Guest user has to confirm methods before they are performed by the system. This setting works in the same way as the Confirm Actions setting on the User Form (see Enable or Disable the Confirm Actions Feature for a User).
- Select the OK button to confirm your choices and close the Options window.
When you have configured the Guest user account, you will need to define its access permissions. For more information, see Allocating Security Permissions.
Further Information
Time Zone Settings: see Time Zone Support in ClearSCADA in the ClearSCADA Guide to Core Configuration.