You can use the Permission Restrictions settings on the Server Configuration Tool to control access on a system-wide basis. For example, you can remove the Acknowledge Alarms permission for every client.
The Permission Restrictions settings are grouped as follows:
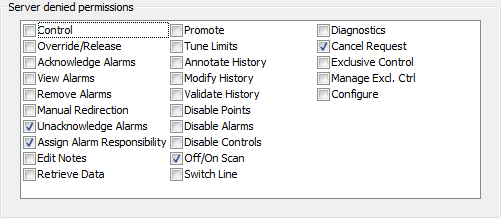
- Server Denied Permissions—The permissions in this group apply to every client that connects to the server (ViewX clients, WebX clients, the Automation interface, and so on).
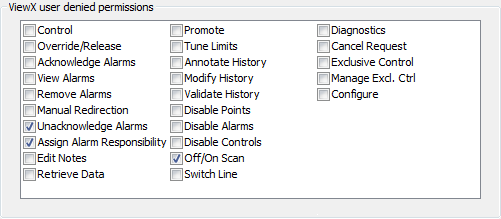
- ViewX User Denied Permissions—The permissions in this group only apply to ViewX and WebX clients.
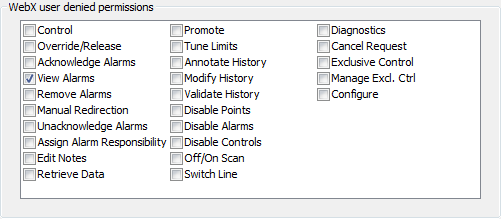
- WebX User Denied Permissions—The permissions in this group only apply to WebX and Original WebX clients. Any changes you make will not affect ViewX clients, the Automation interface, and so on.
NOTE: These settings do not apply to WebX.
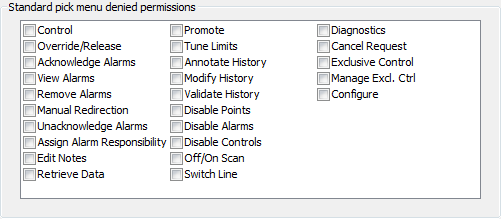
- Standard Pick Menu Denied Permissions—The permissions in this group apply to the options in the standard pick action menu for database items. They apply to the standard pick action menu on ViewX and WebX. However, the permissions only apply to the standard pick menu options; they have no effect on custom pick action menu options or server methods called from scripts.
The main advantages of using the Permission Restrictions settings are that they allow you to:
- Deny permissions to all users or to all ViewX and WebX users without having to alter the configuration of their individual user accounts.
- Specify different types of access according to the type of interface being used. In ViewX, the configuration of a user's user account defines which features are available to that user in both ViewX and WebX.
- Deny access to the various standard pick action menu options for each of the client interfaces. For example, if you want all WebX users to be unable to acknowledge alarms, you can use the Permission Restrictions settings to remove the Acknowledge Alarms permission for all WebX users, irrespective of the permissions allocated to their individual user account
NOTE: The Permission Restrictions settings override other security settings. So, if you have enabled the Configure permission in a ViewX user account, but you have also selected the Configure check box for ViewX in the Permission Restrictions, that user will be unable to configure database items. Users can only access features for which their user accounts provide sufficient permissions and that are not restricted via the Permission Restriction settings.
To configure the Permission Restrictions settings:
- Access the ClearSCADA Server Configuration Tool, (see Accessing the ClearSCADA Server Configuration Tool).
- Expand the required system and node.
- Expand the System Configuration branch.
- Select Permission Restrictions
- In the Server Denied Permissions section, select the check boxes for those permissions that are to be denied on each type of client that accesses the system, including ViewX and WebX clients. Features that are denied in this section do not appear in the security properties for any item in the database. Be careful when denying permissions in this section as you may accidentally prevent users from being able to work with your ClearSCADA system.

- In the ViewX User Denied Permissions section, select the check boxes for those permissions that are to be denied on ViewX and WebX clients. For example, if you select the Exclusive Control permission, ViewX users will be unable to access the Exclusive Control features, even if their user accounts allow them to use Exclusive Control features.

- In the WebX User Denied Permissions section, select the check boxes for those permissions that are to be denied on WebX and Original WebX clients.
NOTE: Certain features are not available in Original WebX, if you select the Control permission, Original WebX users will be unable to issue controls even if their user accounts allow them to issue controls (see Setting Up Security for WebX and Original WebX Clients).

- In the Standard Pick Menu Denied Permissions section, select the check boxes for those permissions that are to be denied for standard pick action menu options. The permissions you select will affect the standard pick action menu on ViewX and WebX. For example, if you select the Acknowledge Alarms permission, the Acknowledge Alarms action will be unavailable via the standard pick action menu on both ViewX and WebX.

- When you have completed the required sections, right-click on the system icon in the Server Configuration Tool and select the Apply Changes option from the context sensitive menu.
- Restart the server.
- Repeat this procedure for each system as required.
NOTE: You cannot restrict the Read, Browse, Security, or System Admin permissions (as incorrect use of these permissions could result in users being unable to access key features or view the database). However, you can assign or deny the Read, Browse, Security and System Admin permissions on a per item basis via each item’s Security window.
Further Information