To create a point alarm state:
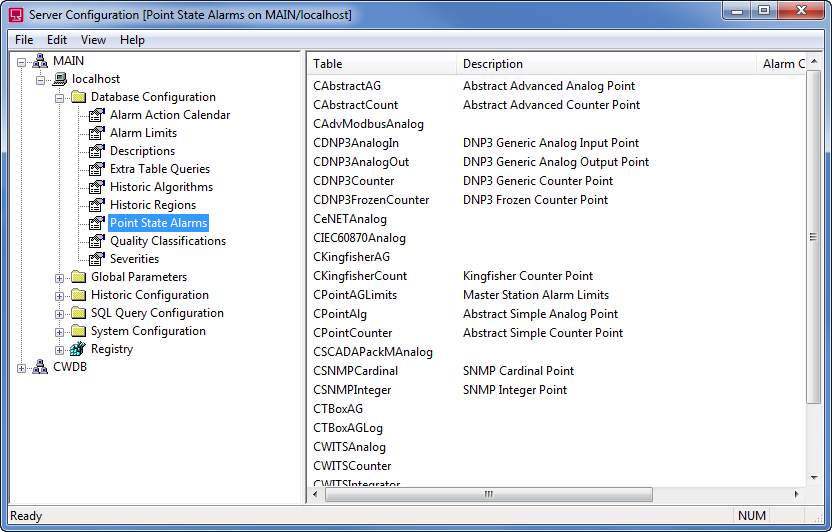
- Display the ClearSCADA Server Configuration Tool (see Accessing the ClearSCADA Server Configuration Tool).
- Expand the Database Configuration branch.
- Select the Point State Alarms branch.
-

- In the Point State Alarms section, double-click on the Table entry for the relevant type of point table. Each table represents a type of database point. There are descriptions for each table—use the description to determine which table is used for the type of point that is to use the point state alarms.
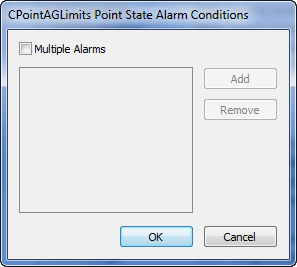
- When you double-click on a table, the Point State Alarm Conditions window is displayed.
-

- Select the Multiple Alarms check box to enable the point state alarms feature for the selected type of points.
- Select the Add button to add a new point state alarm name to the list. It is selected automatically, ready for you to define its name.
- Enter a suitable name for the point state alarm. Remember that engineers will need to associate an alarm state with the point state alarm on the Point Form—the name that you enter should indicate the purpose of the alarm.
- Press the Enter key or select another part of the interface to confirm the selection.
- Repeat steps 6 to 8 inclusive for each point state alarm for the selected type of points.
- Select the OK button to confirm the selection and close the Point State Alarm Conditions window.
- Repeat this procedure for each point state alarm that you want to add.