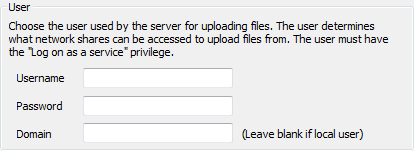
You can use the ClearSCADA Server Configuration Tool to associate the file uploads feature with a Microsoft Windows user account. The network sharing settings for the Windows user account determine which areas of a network can be accessed for uploading files such as reports.
You can associate the file uploads feature with any Microsoft Windows user account that has the 'Log on as a Service' security privilege. However, the user account that you select has to have access to the files that are to be uploaded (by any driver on the server).
For more information on the Windows user account settings, please refer to your Microsoft Windows documentation.
To associate the file uploads feature with a Windows user account:
- Access the ClearSCADA Server Configuration Tool (see Accessing the ClearSCADA Server Configuration Tool).
- Expand the System Configuration branch.
- Select the File Upload branch.
-

- In the Username field, enter the user name for the Microsoft Windows user account that will be used to provide network access for uploading files.
- In the Password field, enter the password for the Microsoft Windows user account.
- In the Domain field, enter the name of the domain with which the Windows user name is associated. Leave this field blank if the user account is local.
NOTE: ClearSCADA usernames and passwords that stored in the registry are encrypted (for example for alarm redirection). You can only decrypt them on the machine from which they were backed up. This means that backing up the registry and then re-applying it to another machine requires you to recreate users in order to use the affected functions. This is also true if windows is re-installed on the machine.
- Right-click on the system icon in the tree-structure, and select the Apply Changes option to apply the changes on the ClearSCADA server.
- Restart the ClearSCADA Server.
The ClearSCADA Server can now access the files that are associated with the defined Windows user account.
When you have defined the File Uploads settings, you can proceed with the server configuration. If you are unfamiliar with the server configuration process, we recommend that you proceed to learn about the Locations of the Database Folders.