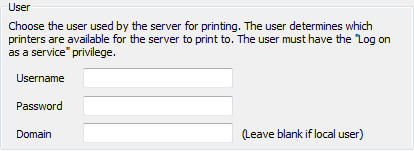
The ClearSCADA server runs as a service within Windows so printing from a ClearSCADA server is dependent on the Windows environment that the server is installed in. To allow the ClearSCADA server to access any local or network printers connected to the Windows server you need to create a suitable Windows user account that can be used in the ClearSCADA server configuration.
NOTE: In Microsoft® Windows®, users can only access those printers that are associated with their Windows user accounts. Refer to your Windows System administrator for details of printers that are available on your system.
To define the printer settings:
- Use Microsoft Windows to setup a user account that has access to the required printers. In addition the user needs be assigned the 'Log on as a Service' security privilege.
ATTENTION: You should create a basic user account on the server with access restricted to using the printers available on the server. Refer to your Windows Server administrator for details of how to configure a restricted user account and assign security privileges.
- Access the ClearSCADA Server Configuration Tool (see Accessing the ClearSCADA Server Configuration Tool).
- Expand the System Configuration branch of the tree-structure.
- Select Printing to access the Printing section.

- In the Username field, enter the user name of the Microsoft Windows user account that is to be used to provide access to the printers.
- In the Password field, enter the password for the Windows account. This has to correspond with the password that has been configured for the user account in Windows.
- In the Domain field, enter the name of the domain with which the username is associated. Leave this field blank if the user account is local or the system does not belong to a domain.
NOTE: ClearSCADA usernames and passwords that are stored in the registry are encrypted (for example for alarm redirection). You can only decrypt them on the machine from which they were backed up. This means that backing up the registry and then re-applying it to another machine requires you to recreate users in order to use the affected functions. This is also true if windows is re-installed on the machine.
- Close the ClearSCADA Server Configuration Tool to apply the changes to the ClearSCADA server’s printer settings (or select another branch if further server configuration is required).
The ClearSCADA Server can now access the printers that are associated with the defined Windows user account. - Restart the ClearSCADA Server to allow Windows to apply the printer setting changes.
If you have a multi-server architecture you need to configure each ClearSCADA server with this user to setup the access same printers. When you have defined the Printer settings, you can proceed with the server configuration. If you are unfamiliar with the server configuration process, we recommend that you proceed to learn about WebX Server Settings.