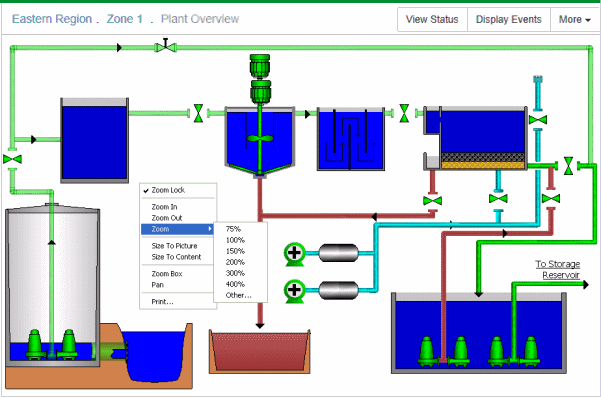
You can use Zoom tools to change how you view a Mimic on a WebX client in the same way as you would use a Mimic in ViewX.
To zoom a Mimic on a WebX client:
- Right-click on a blank area of the Mimic.
A context-sensitive menu is displayed.
- Select the required option:
- Zoom Lock—This option allows you to return the Mimic to its default zoom level. The Zoom Lock turns off automatically if you zoom in or out again.
- Zoom In—Select this option to magnify the Mimic in default increments.
- Zoom Out—Select this option to reduce the magnification of the Mimic in default increments.
- Zoom—Use this option to display a sub-menu from which you can select the level to which you want to magnify the Mimic.
- Size To Picture—Use to set the Mimic to a level of magnification that displays the entire Mimic at the maximum size in the available space. The aspect ratio of the Mimic is maintained.
- Size To Content—Use to set the Mimic to a level of magnification that displays the content of the Mimic at the maximum size in the available space. This differs to the Size to Picture option as it disregards the borders of the Mimic, and sizes the Mimic according to the items it contains.
- Zoom Box—Select this option to magnify a selected part of the Mimic.
- Pan—Select this option to move across the Mimic, so that a different section of the Mimic is displayed in the Mimic window.
- Print—Select this option to send a copy of the Mimic to a printer.
These functions operate in the same way as Zoom functions for Mimics in ViewX (see Operating a Mimic in the ClearSCADA Guide to Mimics).
As with ViewX, if you have a mouse that has a wheel, you can also use the wheel to change the level of magnification on the Mimic.