The Home tab appears on the ViewX ribbon. It contains the following command groups:
- Security
- Operate
- Navigation
- System
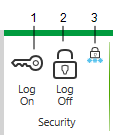
The Security group contains commands that allow you to access System Security.

The commands include:
- Log On—This command allows you to Log On to ViewX
- Log Off—This command allows you to Log Off from ViewX
- Change Password—This command allows you to Change your Password via ViewX. (The command only applies if your User Account is managed directly in ClearSCADA and you have sufficient permissions to change your own password. If your User Account is associated with a Windows User Profile, password changes are managed via the relevant Windows domain.)
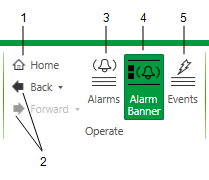
The Operate group contains commands that allow you to navigate forward and backward between Mimics, display Alarms and Events Lists, and the Alarm Banner.

The commands include:
- Home—Only available if a Home Page is configured for the currently logged-on user (or the Guest user if no user is logged on). Select this button to display the default ‘file object’, such as a custom Mimic, that is configured as the Home Page. For more information, see Define the Homepage Settings for a User in the ClearSCADA Guide to Security.
- Back / Forward— displays the previously shown display, such as a Mimic, after you navigate between displays using a hyperlink. After clicking on Back, you can then click on Forward to view the display that was shown before you clicked on Back. You can use the Back and Forward commands, for example, to navigate backwards through multiple Mimics and then navigate forward to the original Mimic.
The drop-down menus associated with the Back and Forward commands list the sequence of previously displayed items in the specified direction. You can jump directly to an item by selecting it from a drop-down menu.
- Alarms—Displays a list of the current alarms on your ClearSCADA system(s). The entries in the List are restricted to those alarms to which the ViewX client and your user account have access. For more information, see Alarms Lists in the ClearSCADA Guide to Alarms.
- Alarms Banner—Displays the Alarms Banner. For more information, see Alarm Banner in the ClearSCADA Guide to Alarms.
- Events—Displays a list of the events on your ClearSCADA system, over a defined time period. The entries in the List are restricted to events associated with those items to which the ViewX client and your user account have access. For more information, see Events.
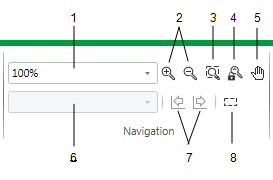
The Navigation group contains commands that allow you to navigate Mimics, Trends, and historic Lists.

The commands include:
- Zoom—Use this combo box to select or specify a specific Mimic Zoom level.
- Zoom In / Zoom Out—Use these commands to increase or decrease the Zoom Level of the Mimic.
- Zoom Box—Use this command to zoom into a specific area of a Mimic by drawing a Zoom Box around the area.
- Zoom Lock—Use this command to return the Mimic to its default zoom level. The Zoom Lock turns off automatically if you zoom in or out again.
- Pan Mode—If the Mimic is larger than the main display area at the current zoom level, use this command to change which area of the Mimic is visible.
- View—This combo box lists any Defined Views that have been configured for your Mimic, for example a view that is zoomed in on a particular area of the Mimic. Select the required view from the list.
- Previous / Next—Use these commands to either:
- Scroll a selected Trend forward and backward.
- Display the records for the previous or next time intervals on an Events List, or Historic List
- Active Pick Action—Use this command to toggle the highlight that shows which Mimic objects are configured to provide access to a pick action.
The System group contains the following command:

- Status—Displays the Status dialog for a selected system.