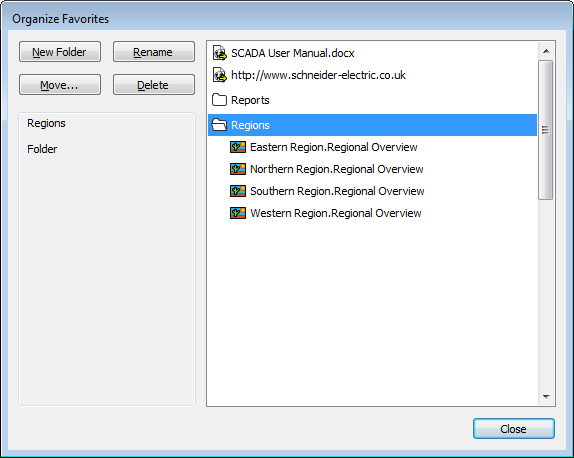
You can use the Organize Favorites window to organize the entries in your Favorites List.
To organize your Favorites List using the Organize Favorites window:
- Display the Favorites Bar (see Display an Explorer Bar in ViewX).
- Select the Organize button at the top of the Favorites Bar.

The Organize Favorites window is displayed. A copy of your Favorites List is displayed in the field on the right-hand side of the window. (Click on a folder if you want to display the contents of that folder.)

You may need to re-size the Organize Favorites window to view the complete names of your Favorites. To re-size the window, select one of its edges, and keeping the left-hand mouse button pressed down, drag the cursor in the required direction. When you release the mouse button, the window is resized.
- Use the Organize Favorites window to perform any of the following:
- Add a New Folder—Use the New Folder button to add a new folder in which to store some Favorites.
A new folder is added to the Favorites List tree-structure (shown in the list on the right-hand side of the Organize Favorites window). The folder is selected automatically, ready for you to define its name.Type in the name of the folder. Press the Enter key on the keyboard, or select another part of the interface, to confirm the name entry.
- Rename a Folder or Link—Select a link or folder from the list on the right-hand side of the window, then select the Rename button.
Type in the new name, then press the Enter key, or select another part of the interface, to confirm the name entry.
The link or folder will display the new name. - Move a Folder or Link—Select the link or folder that you want to move. Do not release the left-hand mouse button. Drag the link over to its required position in the Favorites tree-structure and release the mouse button.
Example:
To move a link into a folder, drag the link onto the required folder. The link is placed in the selected folder.
To move a link out of a folder, drag the link from its present location to its new position (either the root of the Favorites tree-structure, or another folder). The link is moved to its new location
Alternatively, select the link or folder that you want to move and then select the Move button.
The Browse for Folder window is displayed.Use the window to select the required location for the folder or link, then select the OK button.
The link is moved to the new location. - Delete a Folder or Link—Select an obsolete link or folder, then select the Delete button.
A confirmation window is displayed.Select the Yes button to delete the link or folder.
The link or folder is removed from the Favorites List.ATTENTION: If you delete a group, its contents are also deleted.
You can also delete an obsolete link or folder by selecting the link or folder, then pressing the Delete key on the keyboard. Again, a confirmation window is displayed, asking you to confirm the deletion.
- Add a New Folder—Use the New Folder button to add a new folder in which to store some Favorites.
- Once you have finished organizing the entries in your Favorites List, select the Close button on the Organize Favorites window.
The window is closed. Your Favorites List is updated in line with your changes.