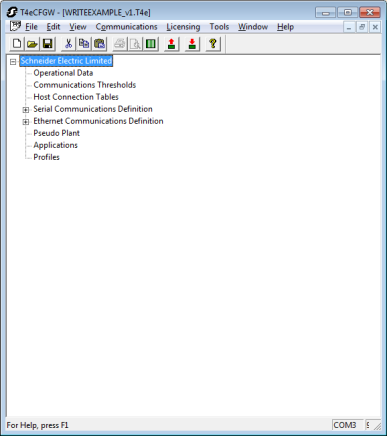
To set up a Schneider Electric Talus T4e to communicate with ClearSCADA, you need to complete several configuration tasks. The first task is to configure the T4e using its Configuration Application.
- Connect your computer to the Talus T4e via an Ethernet cable. This cable needs to be connected to the E1 port on the Talus T4e.
-
Install and run the T4e Talus RTU Configurator Utility (supplied with the T4e).

- Double-click on Serial Communications Definition.
- On the Serial Communications Definition window, set the Local Plant Channel to Configured with Standard Plant Template. This configures the physical on-board inputs and outputs.
- Select OK.
- Double-click on Ethernet Communications Definition.
- Define these settings:
RTU IP Address - Enter the IP Address of your WITS Field Device. (This needs to be an address that is appropriate for your network).
RTU IP Subnet Mask - This should default to 255.255.255.0, which for many setups is suitable. If you need to change the Subnet Mask, please refer to the T4e RTU Configurator Utility documentation.
Host Timeout (x 10 secs) - Enter 6. This sets the timeout to be greater than the default idle timeout in ClearSCADA.
Port 1 - Set the Line Type to Host, Line Protocol to WITS DNP3 Host, Transport Protocol to TCP, End Point Mode of Operation to Server, and Listening IP Port to 20000. The Permanent Connection check box should be selected.
- Select OK.
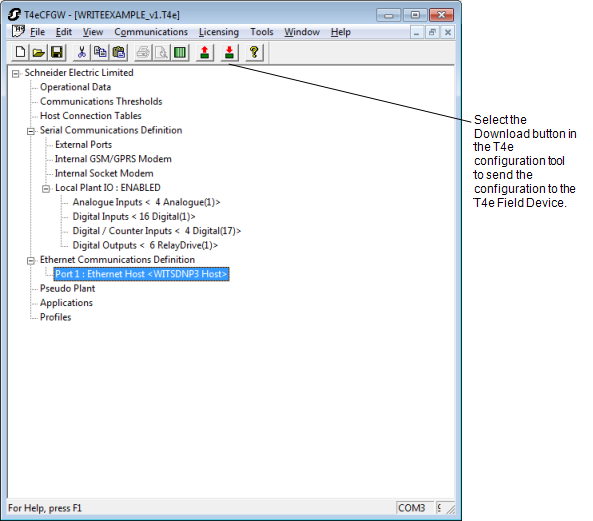
- Expand the Ethernet Communications Definition branch and double-click on Port 1: Ethernet Host <WITSDNP3 Host>.
- On the DNP3 Host Data window, select the DNP3 Parameters tab. Set the RTU Address and DNP3 Host Address. For the purpose of this example, enter 5 as the RTU Address and 6 as the DNP3 Host Address.
- Select the Unsolicited Allowed check box (as Unsolicited is enabled by default for Outstation items in ClearSCADA).
- Select OK.
- Select the Tools menu and choose Configure DNP3 Security Parameters.
- On the DNP3 Security Parameters window, make sure that Authentication Enabled and Aggressive Mode Enabled are both selected (as these are both enabled by default for Outstation items in ClearSCADA).
- Select the User Data button.
- On the User Data window, enter a security User Update Key for User 1. This key has to be 32 hexadecimal digits (as the Talus T4e uses the AES-128 key wrap algorithm by default). For the purpose of this example, enter 01 02 03 04 05 06 07 08 09 10 11 12 13 14 15 16.
- Select the OK button on the User Data window and the DNP3 Security Parameters window.
- Double-click on Operational Data.
- Use the scroll buttons to find the WITS Version Data tab.
- Select the Override default WITS version number (1.2) check box.
- Set the Major Version Number to 1
- Set the Minor Version Number to 1
This sets the Field Device to use a profile for WITS 1.1 (which is the WITS version supported by ClearSCADA).
- Select the Configuration Identification Data tab.
- Enter a version string in the Configuration Version String field. This string is used to track the different versions of configuration, so you should adjust it each time you make local changes to the Field Device configuration. Typically, a date or text with a version number is used for the Configuration Version String, and this is incremented with each subsequent change. For the purpose of this example, enter: v1.
- Select OK.
- Expand the Serial Communications Definition branch and then expand the Local Plant IO: ENABLED branch. Double-click on Analog Inputs.
- On the Local Plant Analog Input Data window, select the Derived Data Definitions tab.
- For each analog input select the Minimum tab and set the Processing Mode to Disable Calculation. This is because the default setting of Store Result in Event Log File is not supported by ClearSCADA.
- Repeat step 28 for the Maximum and Mean tab settings.
- Select the OK button.
- Save the configuration as an incremental configuration file and a bulk configuration file. Select File > Save As and then select Save Full Configuration File. This instructs the configuration tool to save both files.
- Select OK and choose the location for the saved files. Be aware that the File Name uses a <name>_<version>.<extension> format, where the <version> is taken from the Configuration Version String you defined in step 24.
-
Select the Download button to send the updated configuration to the Talus T4e.

- At the prompt, enter the User Name and Password for the Talus T4e. This is required for authentication purposes. When you have entered the correct User Name and Password, the download will take place.
You can now proceed to Example Part 2 - Configure the WITS Items in ClearSCADA.