You can change the positions of the axes on an X-Y-Z Plot. To do this:
- Right-click on the relevant axis.
A context-sensitive menu is displayed. - Select the Show Axes option.
A further context-sensitive menu is displayed. - Select the required axis position(s) from the options offered. The options vary, depending on the type of axis, but include a combination of the following (you can select more than one):
- Back Axis:The axis is positioned to the back of the Time axis.
- Front Axis:The axis is positioned to the front of the Time axis.
- Left Axis:The axis is positioned to the left of the x-axis.
- Right Axis:The axis is positioned to the right of the x-axis.
Example:
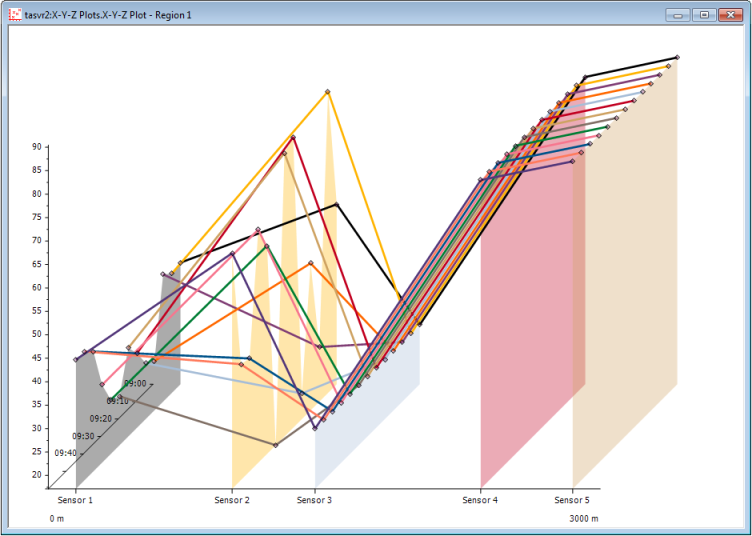
An X-Y-Z Plot with the Time axis displayed to the left and the x- and y-axes displayed to the front:

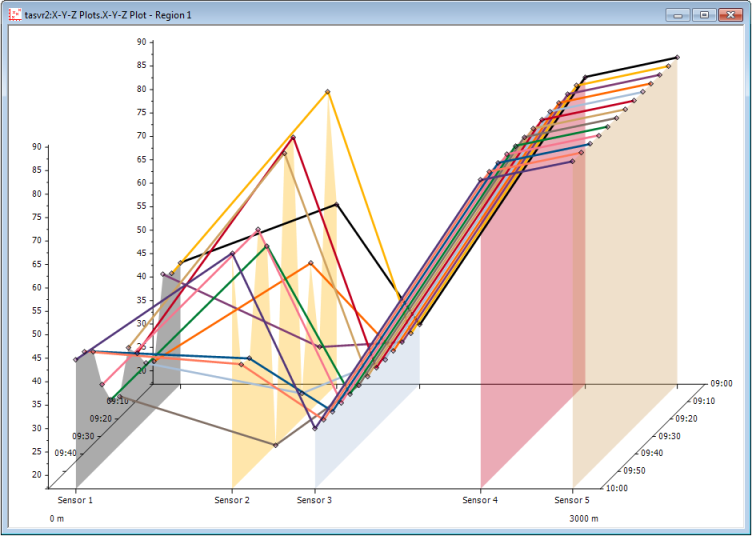
The same X-Y-Z Plot with the axes displayed in both positions (the x- and y-axis to both the Front and Back, and the Time axis to both the Left and Right):

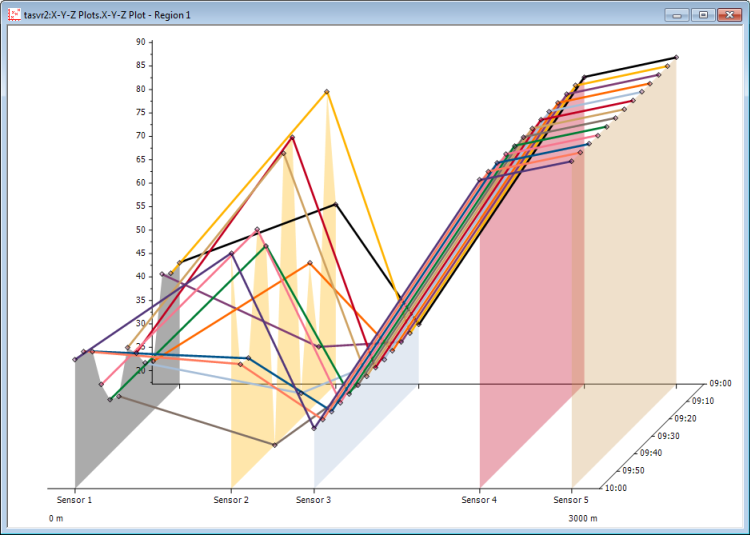
The same X-Y-Z Plot with the x-axis displayed in both positions, the y-axis at the back, and the Time axis to the right:

Further Information
If you are working with an X-Y-Z Plot in Design mode, you can also adjust the length and angle of the Time axis (see Adjust the Time Axis).